您好,登錄后才能下訂單哦!
您好,登錄后才能下訂單哦!
本篇文章為大家展示了利用Vue.extend 怎么制作一個登錄注冊框,內容簡明扼要并且容易理解,絕對能使你眼前一亮,通過這篇文章的詳細介紹希望你能有所收獲。
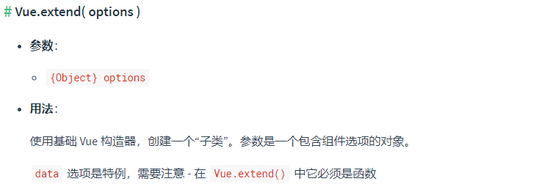
模態框是我們 UI 控件中一個很重要的組件,使用場景有很多種,我們在 Vue 組件中創建模態框組件而用到的一個知識點是利用 Vue.extend 來創建。
文檔中的解釋是

在最近在做一個常用的類似下面的 登錄/注冊 業務場景時,利用 Vue.extend 來改善我們的代碼,使我們代碼邏輯更清晰化。

需求:點擊登錄或注冊出現各自的模態框。
我們對于這種常見的登錄注冊業務,一般都是分為 Sigin.vue 和 Register.vue 兩個組件,然后把兩個組件寫入 App.vue 組件中,或者是 layout.vue 組件中。
原來的這種使用,對于我們的整塊的登錄注冊邏輯是分散的,一些需要登錄或者是權限的邏輯,可能都需要特意去提取一個 Visible 來控制我們的登錄框。
使用 Vue.extend 可以達到統一接口,不用邏輯分散,下面的示例,僅作參考,不了解該 api 使用的可以了解下,而了解的,歡迎指導:smiley:
新建 LoginModel 目錄,新建 Sigin.vue 和 Register.vue 兩個組件
<template>
 <div>登錄</div>
</template>

<template>
 <div>注冊</div>
</template>
再新建 index.vue 組件
<template>
 <div v-if="show">
  <Sigin v-if="type === 'sigin'" @sigin="loginCallback" />
  <Register v-if="type === 'register'" @register="loginCallback" />
 </div>
</template>

<script>
import Sigin from "./sigin";
import Register from "./register";
export default {
 components: {
  Register,
  Sigin
 },
 data() {
  return {
   show: false,
   type: "sigin"
  };
 }
};
</script>新建 index.js ,導入我們的 index.vue
import Vue from "vue";
import ModalCops from "./index.vue";

const LoginModal = Vue.extend(ModalCops); // 創建 Vue 子類

let instance;

const ModalBox = (options = {}) => {
 if (instance) {
  instance.doClose();
 }
 // 實例化
 instance = new LoginModal({
  data: {
   show: true, // 實例化后顯示
   ...options
  }
 });
 instance.$mount();
 document.body.appendChild(instance.$el); // 將模態框添加至 body
 return instance;
};

// 對應的登錄
ModalBox.sigin = () => {
 return ModalBox({
  type: "sigin"
 });
};

ModalBox.register = () => {
 return ModalBox({
  type: "register"
 });
};

export default {
 install(Vue) {
  Vue.prototype.$loginer = ModalBox;
 }
};
創建完成后,我們可以在入口掛載到 Vue 實例上
// main.js
import LoginModal from "./components/LoginModal";

Vue.use(LoginModal);
在需要登錄/注冊的地方只用調用
<div>
 <a href="javascript:;" rel="external nofollow" rel="external nofollow" @click="onLogin('sigin')">登錄</a>
	/
 <a href="javascript:;" rel="external nofollow" rel="external nofollow" @click="onLogin('register')">注冊</a>
</div>

onLogin(type) {
 this.$loginer({
  type
 })
}
效果如下

我們都知道模態框需要關閉事件,而像這種業務的關閉事件必然是需要驗證提交信息,所以我們需要加上關閉回調函數。
修改 Sigin.vue 和 Register.vue 兩個組件,添加事件
// Sigin.vue
<template>
 <div>
  <button @click="onClick">登錄確認</button>
 </div>
</template>

<script>
export default {
 name: "Sigin",
 methods: {
  onClick() {
   this.$emit("sigin");
  }
 }
};
</script>

// Register.vue
<template>
 <button @click="onClick">注冊確認</button>
</template>

<script>
export default {
 name: "Register",
 methods: {
  onClick() {
   this.$emit("register");
  }
 }
};
</script>
修改 index.vue 添加 $emit 事件
<template>
 <div v-if="show">
  <Sigin v-if="type === 'sigin'" @sigin="loginCallback" />
  <Register v-if="type === 'register'" @register="loginCallback" />
 </div>
</template>

<script>
import Sigin from "./sigin";
import Register from "./register";
export default {
 components: {
  Register,
  Sigin
 },
 data() {
  return {
   show: false,
   type: "sigin"
  };
 },
 methods: {
  loginCallback() {
   if (!this.ok) return;
   this.ok().then(valid => {
    if (valid) {
     this.doClose();
    }
   });
  },
  doClose() {
   this.show = false;
  }
 }
};
</script>
修改 index.js 文件
import Vue from "vue";
import ModalCops from "./index.vue";

const LoginModal = Vue.extend(ModalCops);

let instance;

const ModalBox = (options = {}) => {
 if (instance) {
  instance.doClose();
 }
 instance = new LoginModal({
  data: {
   show: true,
   ...options
  }
 });
 instance.ok = () => {
  return new Promise(resolve => {
   const before = options.ok ? options.ok() : false;
   if (before && before.then) {
    before.then(
     () => resolve(true),
     () => {
      console.log("reject");
     }
    );
   } else if (typeof before === "boolean" && before !== false) {
    resolve(true);
   }
  });
 };
 instance.$mount();
 document.body.appendChild(instance.$el);
 return instance;
};

ModalBox.sigin = ok => {
 return ModalBox({
  type: "sigin",
  ok
 });
};

ModalBox.register = ok => {
 return ModalBox({
  type: "register",
  ok
 });
};

ModalBox.close = () => {
 instance.doClose();
 instance.show = false;
};

export default {
 install(Vue) {
  Vue.prototype.$loginer = ModalBox;
 }
};
使用回調
onLogin(type) {
 const funcs = {
  sigin: () => {
   console.log("登錄請求");
  },
  register: () => {
   console.log("注冊請求");
  }
 };
 this.$loginer({
  type,
  ok: () => {
   return new Promise((resolve, reject) => {
    // isOk 驗證數據是否正確
    if (this.isOk) {
     funcs[type]();
     resolve();
    } else {
     reject();
    }
   });
  }
 });
}
上述內容就是利用Vue.extend 怎么制作一個登錄注冊框,你們學到知識或技能了嗎?如果還想學到更多技能或者豐富自己的知識儲備,歡迎關注億速云行業資訊頻道。
免責聲明:本站發布的內容(圖片、視頻和文字)以原創、轉載和分享為主,文章觀點不代表本網站立場,如果涉及侵權請聯系站長郵箱:is@yisu.com進行舉報,并提供相關證據,一經查實,將立刻刪除涉嫌侵權內容。