溫馨提示×
您好,登錄后才能下訂單哦!
點擊 登錄注冊 即表示同意《億速云用戶服務條款》
您好,登錄后才能下訂單哦!
這篇文章給大家介紹微信小程序開發中怎么自定義膠囊的樣式,內容非常詳細,感興趣的小伙伴們可以參考借鑒,希望對大家能有所幫助。
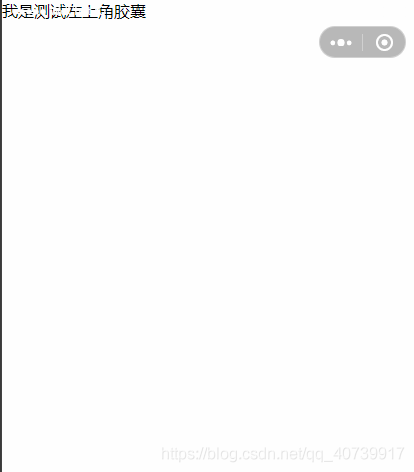
1、 將app.js 中的 window 對象屬性navigationStyle 改為自定義
"window": {
 "navigationStyle": "custom"
 },
改完之后的效果:

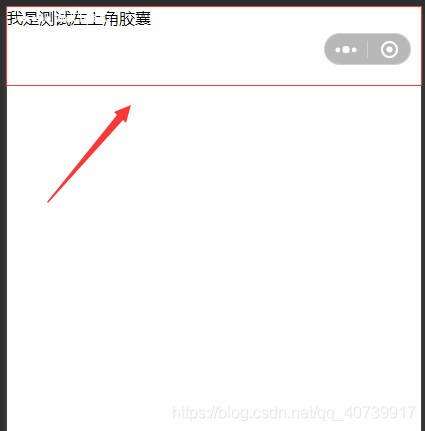
2、獲取 右上角膠囊的定位信息 設置

調用 wx.getMenuButtonBoundingClientRect() 函數得到右上角膠囊定位信息


所需要的 屬性有 : top,height屬性,用于計算自定義左上角膠囊定位的位置
拿到 右上角膠囊的 top和height 相加得到 屏幕導航欄的固定高度:

在 data函數中聲明一個導航欄高度屬性,和一個 膠囊具體定位的top屬性:
賦值導航欄的高度 數據:
// pages/testQ/index.js
Page({

 /**
 * 頁面的初始數據
 */
 data: {
 navHeight:0,
 capsuleTop: 0

 },

 /**
 * 生命周期函數--監聽頁面加載
 */
 onLoad: function (options) {

 },

 /**
 * 生命周期函數--監聽頁面初次渲染完成
 */
 onReady: function () {

 },

 /**
 * 生命周期函數--監聽頁面顯示
 */
 onShow: function () {
 let dwObj = wx.getMenuButtonBoundingClientRect()
 let navHeight_ = (dwObj.top + dwObj.height)
 let capsuleTop_ = dwObj.top
 this.setData(
 {
 navHeight: navHeight_,
 capsuleTop:capsuleTop_

 }
 )
 },

 /**
 * 生命周期函數--監聽頁面隱藏
 */
 onHide: function () {

 },

 /**
 * 生命周期函數--監聽頁面卸載
 */
 onUnload: function () {

 },

 /**
 * 頁面相關事件處理函數--監聽用戶下拉動作
 */
 onPullDownRefresh: function () {

 },

 /**
 * 頁面上拉觸底事件的處理函數
 */
 onReachBottom: function () {

 },

 /**
 * 用戶點擊右上角分享
 */
 onShareAppMessage: function () {

 }
})
在 wxml 中定義 導航欄:
<!--pages/testQ/index.wxml-->

<!-- 左上角膠囊開始-->
<!--left-capsule 是最上層,可以設置背景-->
<view class="left-capsule">
 <!--left-capsule-nav 是用于定位左上角的位置-->
 <view class="left-capsule-nav" >
 <!--left-capsule-nav-content 是 膠囊主要內容-->
 <view  class="left-capsule-nav-content">
 <!--back 膠囊 返回按鈕-->
 <view class="back">
 <!-- 我這個圖標引入的是 vant庫的icon,如果不是使用vant的話 得自定義一個icon-->
 <van-icon name="arrow-left" color="white" size="20"/>
 </view>
 <!-- line 膠囊 中間線條-->
 <view class="line"></view>
 <!-- home 膠囊 返回首頁按鈕-->
 <view class="home">
 <!-- 我這個圖標引入的是 vant庫的icon,如果不是使用vant的話 得自定義一個icon-->
 <van-icon name="wap-home-o" color="white" size="20"/>
 </view>
 </view>
 </view>
 <!-- 以上 可以 封裝成自定義組件,在引入,這個地方是 膠囊外的內容-->
 <view class="main-content" >
 我是測試左上角膠囊
</view>
<!-- 左上角膠囊結束-->
</view>
wxss內容:
/* 導航欄css開始*/
.left-capsule{
 width: 100vh;
 height: 100vh;
 background-color: black;
}
.left-capsule .left-capsule-nav{
 width: 100%;
 position: fixed;
 z-index: 2;
}
.left-capsule-nav .left-capsule-nav-content{
 width: 85px;
 text-align: center;
 border-radius: 50px;
 position: relative;
 top: 26px;
 left: 20px;
 box-shadow:0px 0px 1px 0.2px white;
 background-color: #1d19195c;
 height: 30px;
}
.left-capsule-nav-content view{
 display: inline;
 width: 35px;
 position: relative;
}
.left-capsule-nav-content .back{
 top: 4px;left: -5px;
}
.left-capsule-nav-content .line{
 top: 3px;
 width: 1px;
 border-left: solid #cac3c3 thin;
 height: 17px;
 display: inline-block;
}
.left-capsule-nav-content .home{
 top: 4px;
}
/* 導航欄css結束*/
/* 內容*/
.main-content{
 background-color: red;
 position: absolute;
 width: 100%;
 z-index: 1;

}
關于微信小程序開發中怎么自定義膠囊的樣式就分享到這里了,希望以上內容可以對大家有一定的幫助,可以學到更多知識。如果覺得文章不錯,可以把它分享出去讓更多的人看到。
免責聲明:本站發布的內容(圖片、視頻和文字)以原創、轉載和分享為主,文章觀點不代表本網站立場,如果涉及侵權請聯系站長郵箱:is@yisu.com進行舉報,并提供相關證據,一經查實,將立刻刪除涉嫌侵權內容。