溫馨提示×
您好,登錄后才能下訂單哦!
點擊 登錄注冊 即表示同意《億速云用戶服務條款》
您好,登錄后才能下訂單哦!
今天就跟大家聊聊有關phpstudy2020搭建站點的方法,可能很多人都不太了解,為了讓大家更加了解,小編給大家總結了以下內容,希望大家根據這篇文章可以有所收獲。
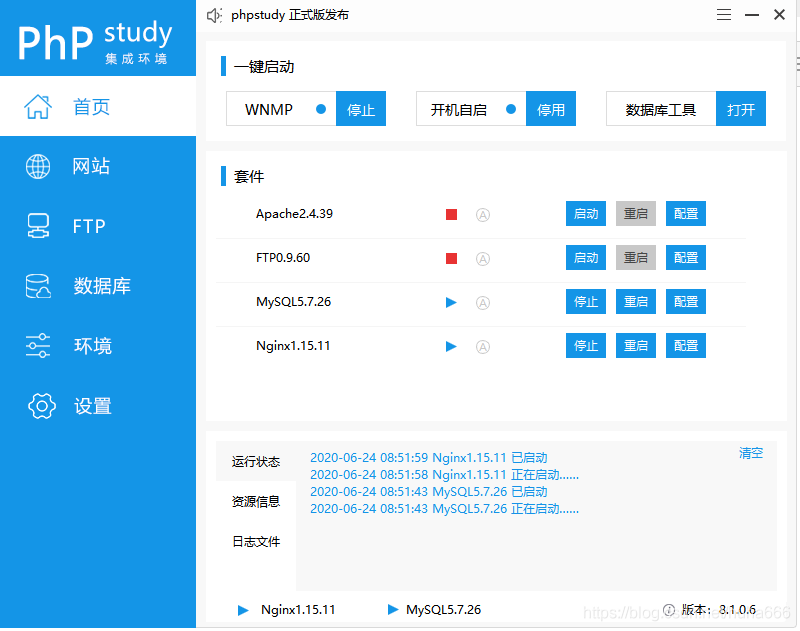
1.下載phpstudy(到官網下載),并安裝后,啟動phpstudy

2. 進入C:\Windows\System32\drivers\etc路徑下的hosts文件,進行如下配置
127.0.0.1 xxxxadmin.com
127.0.0.1 xxxxpartneradmin.com
127.0.0.1 xxxxboadmin.com
127.0.0.1 xxxxbadmin.com
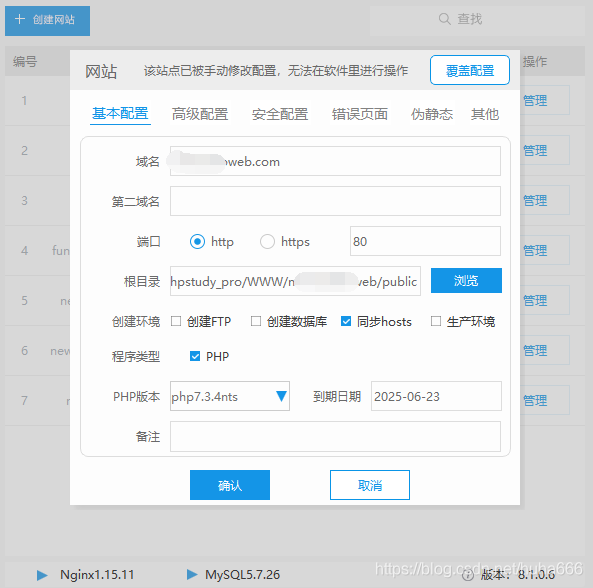
3.在面板的網站下,點擊創建網站,如圖所示

4.修改nginx文件配置

找到相對應的文件,修改如下(主要增加nginx環境配置偽靜態去掉index.php)
server {
    listen    80;
    server_name newsaiboweb.com;
    root  "E:/phpstudy_pro/WWW/new-saibo-web/public";
    location / {
      index index.php index.html error/index.html;
      if (!-e $request_filename){
        rewrite ^(.*)$ /index.php?s=$1 last;
    break;
      }
      error_page 400 /error/400.html;
      error_page 403 /error/403.html;
      error_page 404 /error/404.html;
      error_page 500 /error/500.html;
      error_page 501 /error/501.html;
      error_page 502 /error/502.html;
      error_page 503 /error/503.html;
      error_page 504 /error/504.html;
      error_page 505 /error/505.html;
      error_page 506 /error/506.html;
      error_page 507 /error/507.html;
      error_page 509 /error/509.html;
      error_page 510 /error/510.html;
      autoindex off;
    }
    location ~ \.php(.*)$ {
      fastcgi_pass  127.0.0.1:9000;
      fastcgi_index index.php;
      fastcgi_split_path_info ^((?U).+\.php)(/?.+)$;
      fastcgi_param SCRIPT_FILENAME $document_root$fastcgi_script_name;
      fastcgi_param PATH_INFO $fastcgi_path_info;
      fastcgi_param PATH_TRANSLATED $document_root$fastcgi_path_info;
      include    fastcgi_params;
    }
}
看完上述內容,你們對phpstudy2020搭建站點的方法有進一步的了解嗎?如果還想了解更多知識或者相關內容,請關注億速云行業資訊頻道,感謝大家的支持。
免責聲明:本站發布的內容(圖片、視頻和文字)以原創、轉載和分享為主,文章觀點不代表本網站立場,如果涉及侵權請聯系站長郵箱:is@yisu.com進行舉報,并提供相關證據,一經查實,將立刻刪除涉嫌侵權內容。