溫馨提示×
您好,登錄后才能下訂單哦!
點擊 登錄注冊 即表示同意《億速云用戶服務條款》
您好,登錄后才能下訂單哦!
這篇文章將為大家詳細講解有關如何使用SpringBoot: SpringBoot創建導出Excel的接口,文章內容質量較高,因此小編分享給大家做個參考,希望大家閱讀完這篇文章后對相關知識有一定的了解。
在Web項目中,難免需要導出Excel這樣的功能,后端接口怎么實現呢,Controller代碼在下面,復制到項目的Controller中即可使用:
首先加入Excel的依賴,本例中我們用apache的poi:
<dependency>
 <groupId>org.apache.poi</groupId>
 <artifactId>poi</artifactId>
 <version>3.17</version>
</dependency>
后臺導出Excel的Controller接口代碼:
import org.apache.poi.hssf.usermodel.*;
import org.springframework.stereotype.Controller;
import org.springframework.web.bind.annotation.RequestMapping;

import javax.servlet.http.HttpServletResponse;
import java.io.IOException;

@Controller
public class ExcelController {

 /**
 * Excel表格導出接口
 * http://localhost:8080/ExcelDownload
 * @param response response對象
 * @throws IOException 拋IO異常
 */
 @RequestMapping("/ExcelDownload")
 public void excelDownload(HttpServletResponse response) throws IOException {
 //表頭數據
 String[] header = {"ID", "姓名", "性別", "年齡", "地址", "分數"};

 //數據內容
 String[] student1 = {"1", "小紅", "女", "23", "成都青羊區", "96"};
 String[] student2 = {"2", "小強", "男", "26", "成都金牛區", "91"};
 String[] student3 = {"3", "小明", "男", "28", "成都武侯區", "90"};

 //聲明一個工作簿
 HSSFWorkbook workbook = new HSSFWorkbook();

 //生成一個表格,設置表格名稱為"學生表"
 HSSFSheet sheet = workbook.createSheet("學生表");

 //設置表格列寬度為10個字節
 sheet.setDefaultColumnWidth(10);

 //創建第一行表頭
 HSSFRow headrow = sheet.createRow(0);

 //遍歷添加表頭(下面模擬遍歷學生,也是同樣的操作過程)
 for (int i = 0; i < header.length; i++) {
  //創建一個單元格
  HSSFCell cell = headrow.createCell(i);

  //創建一個內容對象
  HSSFRichTextString text = new HSSFRichTextString(header[i]);

  //將內容對象的文字內容寫入到單元格中
  cell.setCellValue(text);
 }

 //模擬遍歷結果集,把內容加入表格
 //模擬遍歷第一個學生
 HSSFRow row1 = sheet.createRow(1);
 for (int i = 0; i < student1.length; i++) {
  HSSFCell cell = row1.createCell(i);
  HSSFRichTextString text = new HSSFRichTextString(student1[i]);
  cell.setCellValue(text);
 }

 //模擬遍歷第二個學生
 HSSFRow row2 = sheet.createRow(2);
 for (int i = 0; i < student2.length; i++) {
  HSSFCell cell = row2.createCell(i);
  HSSFRichTextString text = new HSSFRichTextString(student2[i]);
  cell.setCellValue(text);
 }

 //模擬遍歷第三個學生
 HSSFRow row3 = sheet.createRow(3);
 for (int i = 0; i < student3.length; i++) {
  HSSFCell cell = row3.createCell(i);
  HSSFRichTextString text = new HSSFRichTextString(student3[i]);
  cell.setCellValue(text);
 }

 //準備將Excel的輸出流通過response輸出到頁面下載
 //八進制輸出流
 response.setContentType("application/octet-stream");

 //這后面可以設置導出Excel的名稱,此例中名為student.xls
 response.setHeader("Content-disposition", "attachment;filename=student.xls");

 //刷新緩沖
 response.flushBuffer();

 //workbook將Excel寫入到response的輸出流中,供頁面下載
 workbook.write(response.getOutputStream());
 }
}
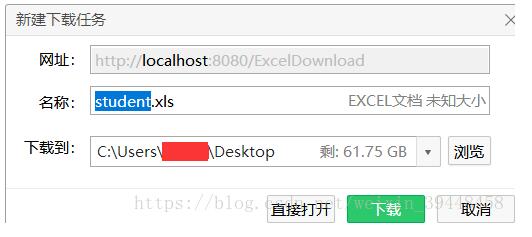
然后訪問接口,彈出頁面:

下載該Excel,打開后如下圖:

至此為止,SpringBoot的后臺Controller接口導出Excel數據表,已成功實現!
后來我封裝了一個靜態方法,可以在項目中作為工具類使用:
import org.apache.poi.hssf.usermodel.*;
import javax.servlet.http.HttpServletResponse;
import java.io.IOException;
import java.util.List;

/**
 * Excel工具類
 */
public class ExcelUtil {

 /**
 * Excel表格導出
 * @param response HttpServletResponse對象
 * @param excelData Excel表格的數據,封裝為List<List<String>>
 * @param sheetName sheet的名字
 * @param fileName 導出Excel的文件名
 * @param columnWidth Excel表格的寬度,建議為15
 * @throws IOException 拋IO異常
 */
 public static void exportExcel(HttpServletResponse response,
     List<List<String>> excelData,
     String sheetName,
     String fileName,
     int columnWidth) throws IOException {

 //聲明一個工作簿
 HSSFWorkbook workbook = new HSSFWorkbook();

 //生成一個表格,設置表格名稱
 HSSFSheet sheet = workbook.createSheet(sheetName);

 //設置表格列寬度
 sheet.setDefaultColumnWidth(columnWidth);

 //寫入List<List<String>>中的數據
 int rowIndex = 0;
 for(List<String> data : excelData){
  //創建一個row行,然后自增1
  HSSFRow row = sheet.createRow(rowIndex++);

  //遍歷添加本行數據
  for (int i = 0; i < data.size(); i++) {
  //創建一個單元格
  HSSFCell cell = row.createCell(i);

  //創建一個內容對象
  HSSFRichTextString text = new HSSFRichTextString(data.get(i));

  //將內容對象的文字內容寫入到單元格中
  cell.setCellValue(text);
  }
 }

 //準備將Excel的輸出流通過response輸出到頁面下載
 //八進制輸出流
 response.setContentType("application/octet-stream");

 //設置導出Excel的名稱
 response.setHeader("Content-disposition", "attachment;filename=" + fileName);

 //刷新緩沖
 response.flushBuffer();

 //workbook將Excel寫入到response的輸出流中,供頁面下載該Excel文件
 workbook.write(response.getOutputStream());

 //關閉workbook
 workbook.close();
 }
}
以上方法調用示例:
/**
 * Excel表格導出接口
 * http://localhost:8080/ExcelDownload
 * @param response response對象
 * @throws IOException 拋IO異常
 */
@RequestMapping("/ExcelDownload")
public void excelDownload(HttpServletResponse response) throws IOException {

 List<List<String>> excelData = new ArrayList<>();

 List<String> head = new ArrayList<>();
 head.add("第一列");
 head.add("第二列");
 head.add("第三列");

 List<String> data1 = new ArrayList<>();
 data1.add("123");
 data1.add("234");
 data1.add("345");

 List<String> data2 = new ArrayList<>();
 data2.add("abc");
 data2.add("bcd");
 data2.add("cde");

 excelData.add(head);
 excelData.add(data1);
 excelData.add(data2);

 String sheetName = "測試";
 String fileName = "ExcelTest.xls";

 ExcelUtil.exportExcel(response, excelData, sheetName, fileName, 15);
}
關于如何使用SpringBoot: SpringBoot創建導出Excel的接口就分享到這里了,希望以上內容可以對大家有一定的幫助,可以學到更多知識。如果覺得文章不錯,可以把它分享出去讓更多的人看到。
免責聲明:本站發布的內容(圖片、視頻和文字)以原創、轉載和分享為主,文章觀點不代表本網站立場,如果涉及侵權請聯系站長郵箱:is@yisu.com進行舉報,并提供相關證據,一經查實,將立刻刪除涉嫌侵權內容。