溫馨提示×
您好,登錄后才能下訂單哦!
點擊 登錄注冊 即表示同意《億速云用戶服務條款》
您好,登錄后才能下訂單哦!
這篇文章給大家分享的是有關Spring Boot Swagger2的案例分析的內容。小編覺得挺實用的,因此分享給大家做個參考。一起跟隨小編過來看看吧。
1.添加Swagger2依賴
<dependency>
  <groupId>io.springfox</groupId>
  <artifactId>springfox-swagger2</artifactId>
  <version>2.2.2</version>
</dependency>
<dependency>
   <groupId>io.springfox</groupId>
  <artifactId>springfox-swagger-ui</artifactId>
  <version>2.2.2</version>
</dependency>
2配置類
@Configuration
@EnableSwagger2
public class Swagger2 {
  @Bean
  public Docket createRestApi() {
    return new Docket(DocumentationType.SWAGGER_2)
        .apiInfo(apiInfo())
        .select()
        .apis(RequestHandlerSelectors.basePackage("com.bs.swaggertest.controller"))
        .paths(PathSelectors.any())
        .build();
  }
  private ApiInfo apiInfo() {
    return new ApiInfoBuilder()
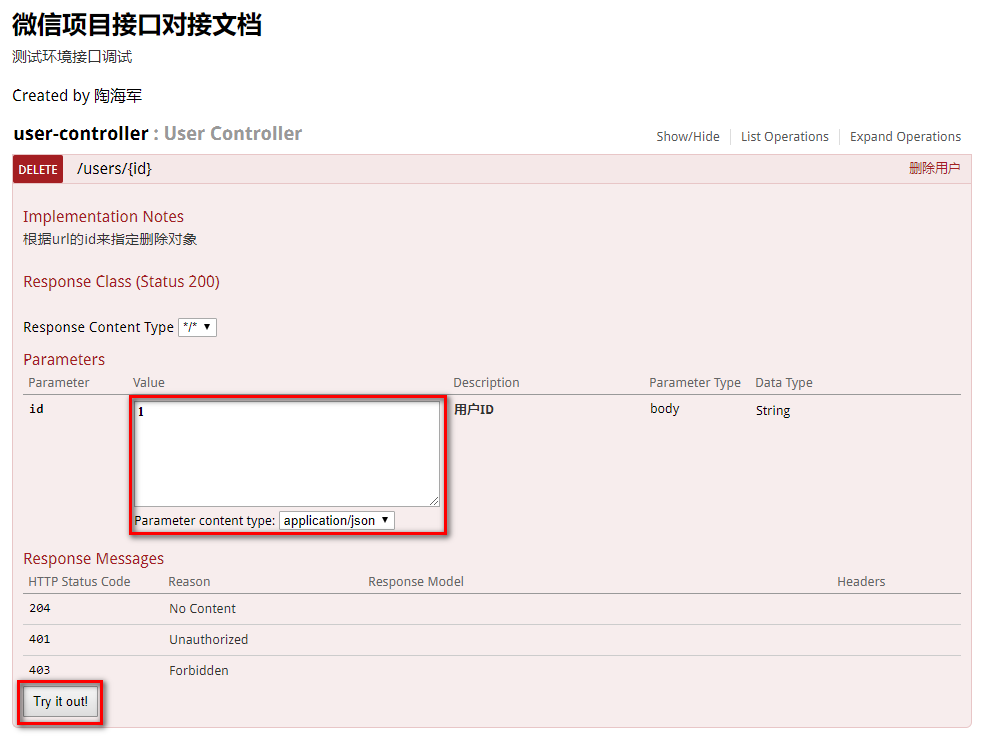
        .title("微信項目接口對接文檔")
        .description("測試環境接口調試")
        .contact("陶海軍")
        .version("1.0")
        .build();
  }
}
3.添加文檔內容
@RestController
@RequestMapping(value="/users")
public class UserController {
  @ApiOperation(value="刪除用戶", notes="根據url的id來指定刪除對象")
  @ApiImplicitParam(name = "id", value = "用戶ID", required = true, dataType = "String")
  @RequestMapping(value="/{id}", method=RequestMethod.DELETE)
  public String deleteUser(@PathVariable String id) {
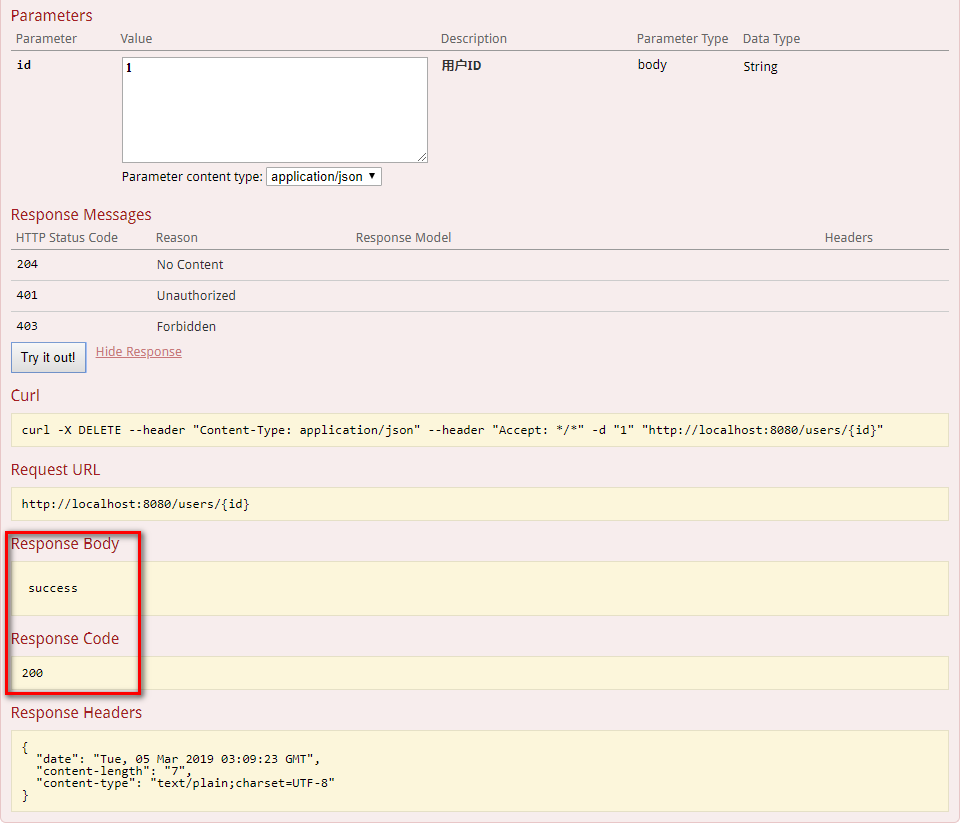
    return "success";
  }
}
4.測試
http://localhost:8080/swagger-ui.html


感謝各位的閱讀!關于Spring Boot Swagger2的案例分析就分享到這里了,希望以上內容可以對大家有一定的幫助,讓大家可以學到更多知識。如果覺得文章不錯,可以把它分享出去讓更多的人看到吧!
免責聲明:本站發布的內容(圖片、視頻和文字)以原創、轉載和分享為主,文章觀點不代表本網站立場,如果涉及侵權請聯系站長郵箱:is@yisu.com進行舉報,并提供相關證據,一經查實,將立刻刪除涉嫌侵權內容。