您好,登錄后才能下訂單哦!
您好,登錄后才能下訂單哦!
整個OpenStack是由控制節點,計算節點,網絡節點,存儲節點四大部分組成。上篇博文詳細講述了控制節點服務controller中的keystone組件,本篇博文將對nova組件部署進行分析,分為兩部分:控制節點和計算節點都需要設置。
計算節點包含Nova,Neutron,Telemeter三個服務
1)基礎服務
Nova:提供虛擬機的創建,運行,遷移,快照等各種圍繞虛擬機的服務,并提供API與控制節點對接,由控制節點下發任務
Neutron:提供計算節點與網絡節點之間的通信服務
2)擴展服務
Telmeter:提供計算節點的監控代理,將虛擬機的情況反饋給控制節點,是Centimeter的代理服務
計算節點包含最少兩個網絡端口
eth0:與控制節點進行通信,受控制節點統一調配
eth2:與網絡節點,存儲節點進行通信
| 主機 | 系統 | IP地址 | 角色 |
|---|---|---|---|
| controller | CentOS7 | 192.168.37.128 | keystone、nova、ntp、mariadb、rabbitmq、memcached、etcd、apache |
| compute | CentOS7 | 192.168.37.130 | nova、ntp |
| cinder | CentOS7 | 192.168.37.131 | cinder、ntp |
++controller節點++
1、創建nova_api, nova, nova_cell0數據庫
mysql -u root -p
CREATE DATABASE nova_api;
CREATE DATABASE nova;
CREATE DATABASE nova_cell0;
2、數據庫登錄授權
grant all privileges on nova_api. to 'nova'@'localhost' identified by '123456';
grant all privileges on nova_api. to 'nova'@'%' identified by '123456';
grant all privileges on nova. to 'nova'@'localhost' identified by '123456';
grant all privileges on nova. to 'nova'@'%' identified by '123456';
grant all privileges on nova_cell0. to 'nova'@'localhost' identified by '123456';
grant all privileges on nova_cell0. to 'nova'@'%' identified by '123456';
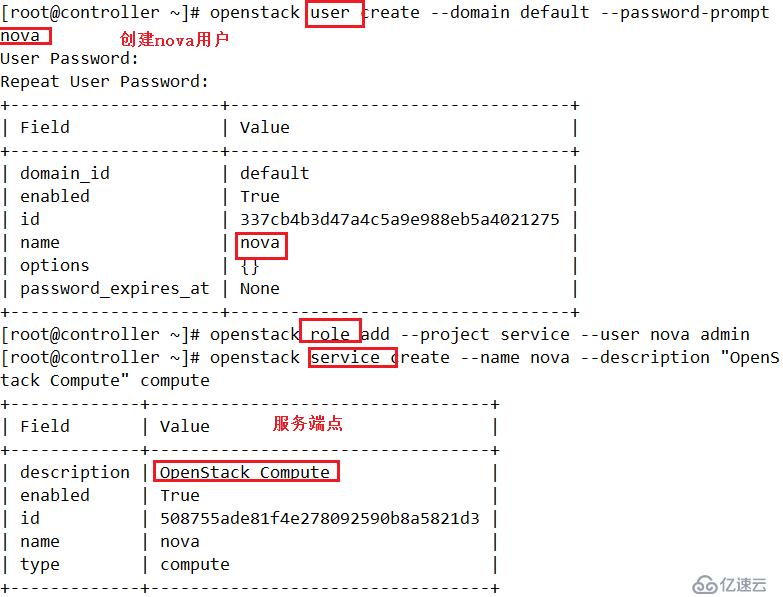
3、創建nova用戶
source ~/admin-openrc
openstack user create --domain default --password-prompt nova
密碼:123456
4、添加admin用戶為nova用戶
openstack role add --project service --user nova admin
5、創建nova服務端點
openstack service create --name nova --description "OpenStack Compute" compute
6、創建compute API 服務端點
openstack endpoint create --region RegionOne compute public http://controller:8774/v2.1                  #public的API端點
openstack endpoint create --region RegionOne compute internal http://controller:8774/v2.1                  #internal的API端點
openstack endpoint create --region RegionOne compute admin http://controller:8774/v2.1 #admin的API端點一個資源提供者可以是一個計算節點,共享存儲池,或一個IP分配池。
placement服務跟蹤每個供應商的庫存和使用情況。
例如,在一個計算節點創建一個實例的可消費資源如計算節點的資源提供者的CPU和內存,磁盤從外部共享存儲池資源提供商和IP地址從外部IP資源提供者。
1、創建placement用戶
openstack user create --domain default --password-prompt placement
#密碼:123456
2、添加placement用戶為項目服務admin角色
openstack role add --project service --user placement admin
3、創建Placement API服務
openstack service create --name placement --description "Placement API" placement
4、創建Placement API服務端點
openstack endpoint create --region RegionOne placement public http://controller:8778                         #public的API端點
openstack endpoint create --region RegionOne placement internal http://controller:8778                         #internal的API端點
openstack endpoint create --region RegionOne placement admin http://controller:8778 #admin的API端點1、安裝軟件包
yum install openstack-nova-api openstack-nova-conductor openstack-nova-console openstack-nova-novncproxy openstack-nova-scheduler openstack-nova-placement-api -y
2、編輯nova配置文件
vim /etc/nova/nova.conf
[DEFAULT]
#2756行
enabled_apis=osapi_compute,metadata                      #開啟API
#3156行
transport_url=rabbit://openstack:123456@controller    #消息隊列
#1291行
my_ip=192.168.37.128                                                    #主機IP
#1755行
use_neutron=true                                                              #開啟網絡組件
#2417行
firewall_driver=nova.virt.firewall.NoopFirewallDriver    #防火墻設置

[api_database]
#3513行
connection=mysql+pymysql://nova:123456@controller/nova_api

[database]
#4637行
connection=mysql+pymysql://nova:123456@controller/nova

[api]
#3221行
auth_strategy=keystone          #授權注冊

[keystone_authtoken]           #令牌模塊
#6149行
auth_uri=http://controller:5000
auth_url=http://controller:35357
#6200行
memcached_servers=controller:11211
#6307行 :添加以下行數設置
auth_type=password
project_domain_name = default
user_domain_name = default
project_name = service
username = nova
password = 123456

[vnc]
#10292行
enabled=true
#10316行
server_listen=$my_ip
#10329行
server_proxyclient_address=$my_ip

[glance]
#5342行
api_servers=http://controller:9292

[oslo_concurrency]
#7920行
lock_path=/var/lib/nova/tmp

[placement]
#8819行
os_region_name=RegionOne
#8859行
auth_type=password
#8865行
auth_url=http://controller:35357/v3
#8880行
project_name=service
#8886行
project_domain_name=Default
#8906行
username=placement
#8912行
user_domain_name=Default
#8915行
password=123456#注意:配置文件是實時更新的,行數標注不一定準確,需仔細對照修改內容。另外,修改條目較多,可通過以下命令進行查看:
grep -v "#" /etc/nova/nova.conf | grep -v "^$"
3、由于包錯誤,必須啟用對Placement API的訪問,在文件末尾添加以下內容
vim /etc/httpd/conf.d/00-nova-placement-api.conf

<Directory /usr/bin>
   <IfVersion >= 2.4>
      Require all granted
   </IfVersion>
   <IfVersion < 2.4>
      Order allow,deny
      Allow from all
   </IfVersion>
</Directory>1、由于修改了httpd配置文件,需重啟服務
systemctl restart httpd.service
2、同步nova-api數據庫
su -s /bin/sh -c "nova-manage api_db sync" nova

3、注冊cell0數據庫
su -s /bin/sh -c "nova-manage cell_v2 map_cell0" nova
4、注冊cell1 cell數據庫
su -s /bin/sh -c "nova-manage cell_v2 create_cell --name=cell1 --verbose" nova

5、同步nova數據庫
su -s /bin/sh -c "nova-manage db sync" nova
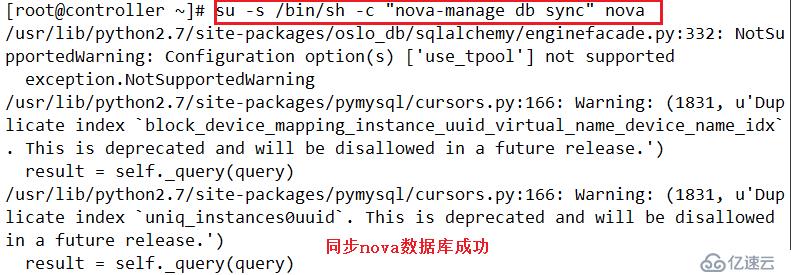
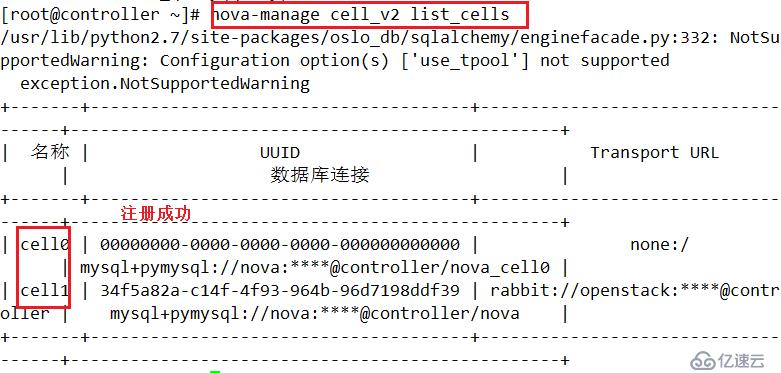
6、驗證 nova、 cell0、 cell1數據庫是否注冊正確
nova-manage cell_v2 list_cells
7、開啟controller上所有nova服務模塊,設置開機自啟動
systemctl enable openstack-nova-api.service
systemctl enable openstack-nova-consoleauth.service
systemctl enable openstack-nova-scheduler.service
systemctl enable openstack-nova-conductor.service
systemctl enable openstack-nova-novncproxy.service

systemctl start openstack-nova-api.service
systemctl start openstack-nova-consoleauth.service
systemctl start openstack-nova-scheduler.service
systemctl start openstack-nova-conductor.service
systemctl start openstack-nova-novncproxy.service
++compute節點++
1、yum安裝nova節點包
yum install openstack-nova-compute -y
2、修改配置文件
vim /etc/nova/nova.conf
[DEFAULT]
#1291
my_ip = 192.168.37.130
#1755
use_neutron=true
#2417
firewall_driver=nova.virt.firewall.NoopFirewallDriver
#2756
enabled_apis = osapi_compute,metadata
#3156
transport_url = rabbit://openstack:123456@controller

[api]
#3221
auth_strategy=keystone

[keystone_authtoken]
#6148
auth_uri = http://192.168.37.128:5000
auth_url = http://controller:35357
#6199
memcached_servers=controller:11211
#6306
auth_type=password
project_domain_name=default
user_domain_name=default
project_name=service
username=nova
password=123456

[vnc]
#10291
enabled=true
#10315
server_listen=0.0.0.0
#10328
server_proxyclient_address=$my_ip
#10346
novncproxy_base_url=http://controller:6080/vnc_auto.html

[glance]
#5341
api_servers=http://controller:9292

[oslo_concurrency]
#7919
lock_path=/var/lib/nova/tmp

[placement]
#8818
os_region_name=RegionOne
#8858
auth_type = password
#8864
auth_url=http://controller:35357/v3
#8879
project_name = service
#8885
project_domain_name = Default
#8911
user_domain_name = Default
#8905
username = placement
#8914
password = 123456#注意:配置文件是實時更新的,行數標注不一定準確,模塊和controller上相同,需仔細對照修改內容。另外,修改條目較多,可通過以下命令進行查看:
grep -v "#" /etc/nova/nova.conf | grep -v "^$"
3、開啟相關服務,設置開機自啟動
systemctl enable libvirtd.service
systemctl enable openstack-nova-compute.service
systemctl stop libvirtd
systemctl start libvirtd
systemctl enable openstack-nova-compute.service
systemctl start openstack-nova-compute.service
++controller節點++
1、驗證有幾個計算節點在數據庫中
source ~/admin-openrc
openstack compute service list --service nova-compute
2、查看計算節點
su -s /bin/sh -c "nova-manage cell_v2 discover_hosts --verbose" nova
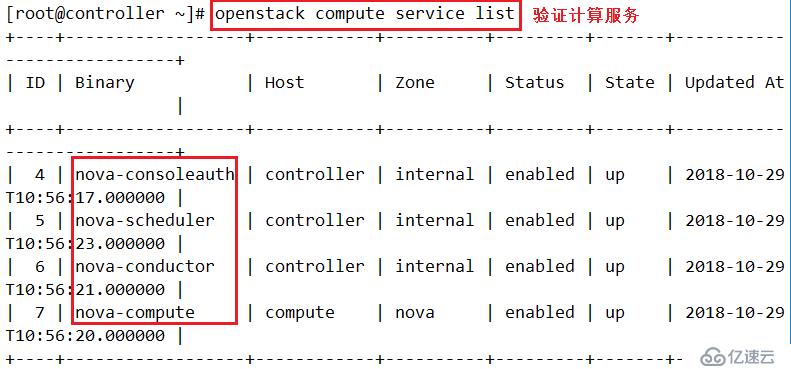
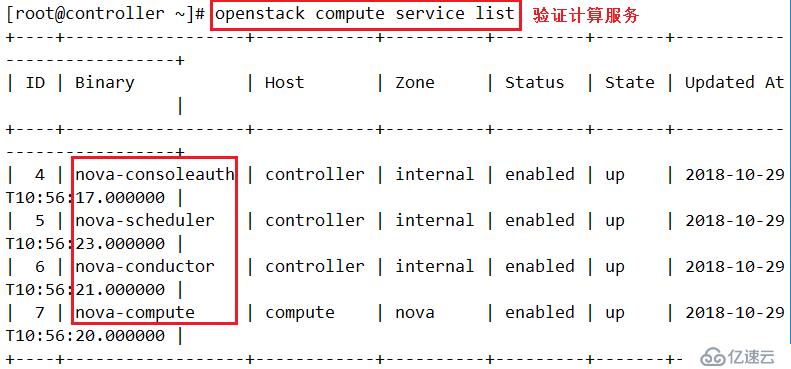
3、列出計算節點服務
openstack compute service list
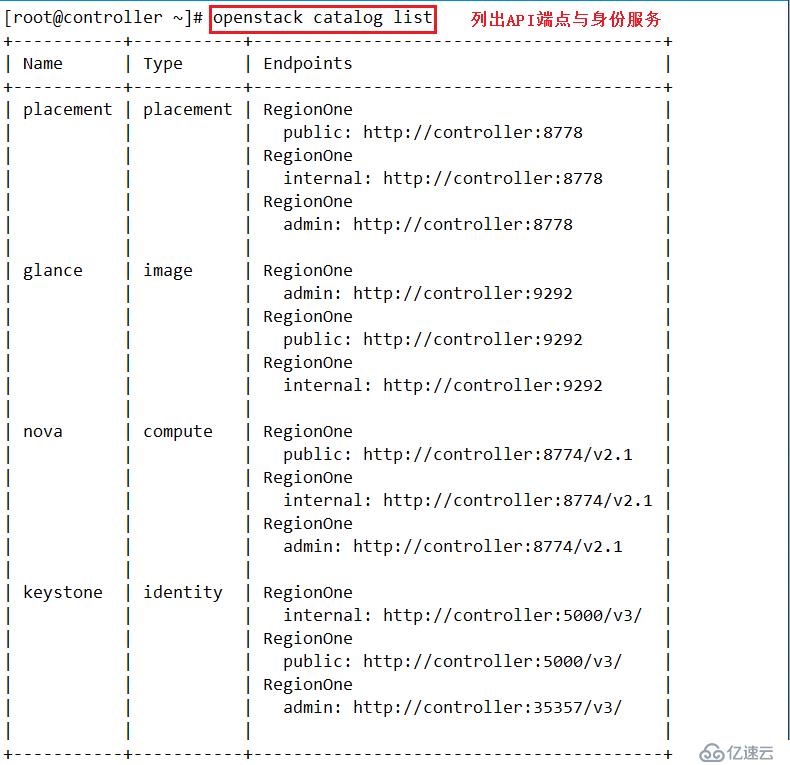
4、列出身份服務中的API端點,驗證與身份服務的連接
openstack catalog list
5、列出鏡像
openstack image list
+--------------------------------------+--------+--------+
| ID | Name | Status |
+--------------------------------------+--------+--------+
| 204c1831-4abf-481b-80ab-609eb9b06f2d | cirros | active |
+--------------------------------------+--------+--------+
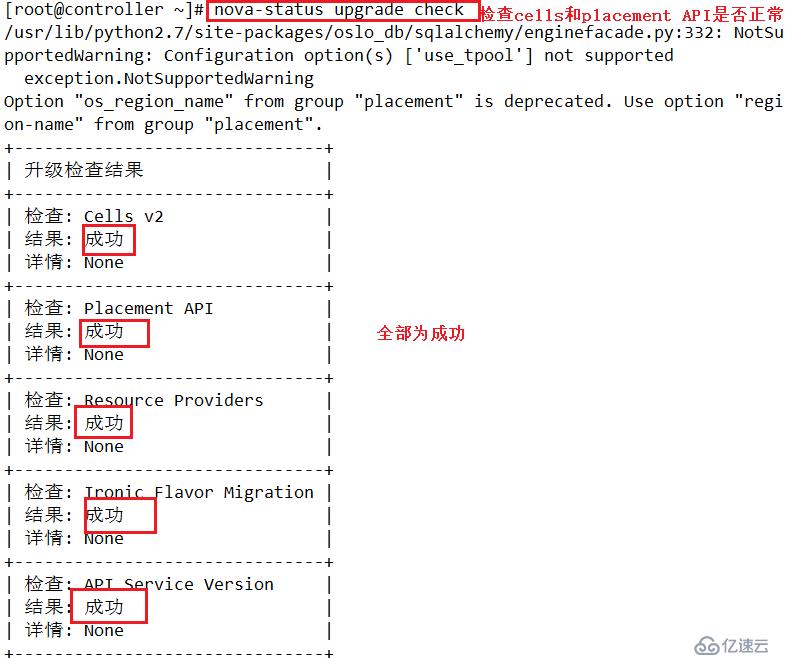
6、檢查cells和placement API是否正常
nova-status upgrade check
免責聲明:本站發布的內容(圖片、視頻和文字)以原創、轉載和分享為主,文章觀點不代表本網站立場,如果涉及侵權請聯系站長郵箱:is@yisu.com進行舉報,并提供相關證據,一經查實,將立刻刪除涉嫌侵權內容。