您好,登錄后才能下訂單哦!
您好,登錄后才能下訂單哦!
下文給大家帶來怎么樣使用nginx+Apache負載均衡及動靜分離 ,希望能夠給大家在實際運用中帶來一定的幫助,負載均衡涉及的東西比較多,理論也不多,網上有很多書籍,今天我們就用億速云在行業內累計的經驗來做一個解答。
使用nginx+Apache負載均衡及動靜分離
介紹
LB負載均衡集群分兩類: LVS (四層)和 nginx或haproxy (七層)
客戶端都是通過訪問分發器的VIP來訪問網站 在七層中的網站頁面有: .php .html .png .jpeg .jsp 等, 有動態頁面有靜態頁面。 需要在應用層基于不同的應用進行分發。
一:實驗拓撲圖:

二:實驗目標
實戰:使用Apache+nginx實現動靜分離的負載均衡集群
三:實驗環境
主機作用分類 | 主機名 | IP地址 | 安裝軟件 |
Nginx,代理云服務器 | xuegod63.cn | 192.168.1.63 | nginx-1.8.0.tar.gz |
Apache,靜態頁面處理 | xuegod62.cn | 192.168.1.62 | http |
Apache,靜態頁面處理 | xuegod64.cn | 192.168.1.64 | http |
Apache,動態頁面處理 | xuegod62.cn | 192.168.1.62 | http |
Apache,動態頁面處理 | xuegod64.cn | 192.168.1.64 | http |
Apache,圖片處理 | xuegod62.cn | 192.168.1.62 | http |
Apache,圖片處理 | xuegod64.cn | 192.168.1.64 | http |
四:實驗代碼
1、配置分發器xuegod63(代理服務器)
1)安裝nginx時必須先安裝相應的編譯工具
[root@xuegod63 ~]#yum -y install gcc gcc-c++ autoconf automake
[root@xuegod63 ~]#yum -y install zlib zlib-devel openssl openssl-devel pcre pcre-devel
zlib: nginx提供gzip模塊,需要zlib庫支持
openssl:nginx提供ssl功能
pcre:支持地址重寫rewrite功能
2)安裝nginx:
[root@xuegod63 ~]# tar -zxvf nginx-1.8.0.tar.gz -C /usr/local/src/
[root@xuegod63 ~]# cd /usr/local/src/nginx-1.8.0/
[root@xuegod63 nginx-1.8.0]# ./configure --prefix=/server/nginx-1.8.0 --with-http_dav_module --with-http_stub_status_module --with-http_addition_module --with-http_sub_module --with-http_flv_module --with-http_mp4_module
參數解釋:
--with-http_dav_module 啟用ngx_http_dav_module支持(增加PUT,DELETE,MKCOL:創建集合,COPY和MOVE方法)默認情冴下為關閉,需編譯開啟
--with-http_stub_status_module 啟用ngx_http_stub_status_module支持(獲取nginx自上次啟動以來的工作狀態)
--with-http_addition_module 啟用ngx_http_addition_module支持(作為一個輸出過濾器,支持不完全緩沖,分部分響應請求)
--with-http_sub_module 啟用ngx_http_sub_module支持(允許用一些其他文本替換nginx響應中的一些文本)
--with-http_flv_module 啟用ngx_http_flv_module支持(提供尋求內存使用基于時間的偏移量文件)
--with-http_mp4_module 啟用對mp4文件支持(提供尋求內存使用基于時間的偏移量文件)
3)編譯和安裝:
[root@xuegod63 nginx-1.8.0]#make -j 4
[root@xuegod63 nginx-1.8.0]#make install
4)生成運行nginx的用戶:
[root@xuegod63 nginx-1.8.0]# useradd -u 8000 -s /sbin/nologin nginx
5)啟動nginx:
[root@xuegod63 /]# /server/nginx-1.8.0/sbin/nginx
[root@xuegod63 nginx-1.8.0]# echo '/server/nginx-1.8.0/sbin/nginx & ' >> /etc/rc.local
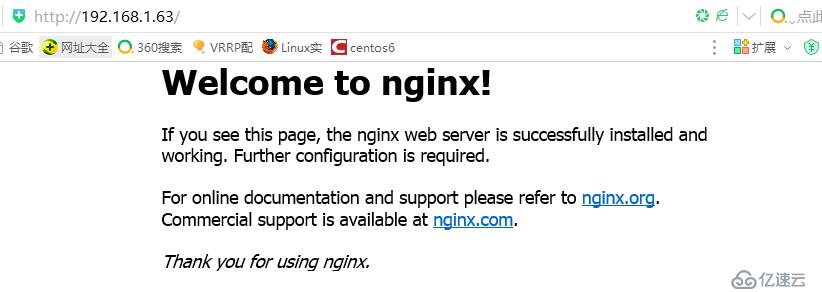
6)測試: http://192.168.1.63/
7)nginx服務日常操作: :
(1)測試配置文件是否正確語法:
[root@xuegod63 nginx-1.8.0]# /server/nginx-1.8.0/sbin/nginx -t
nginx: the configuration file /server/nginx-1.8.0/conf/nginx.conf syntax is ok
nginx: configuration file /server/nginx-1.8.0/conf/nginx.conf test is successful
(2)重新加載配置文件
[root@xuegod63 nginx-1.8.0]# /server/nginx-1.8.0/sbin/nginx -s reload
(3)關閉與開啟nginx
[root@xuegod63 /]# /server/nginx-1.8.0/sbin/nginx -s stop
[root@xuegod63 /]# /server/nginx-1.8.0/sbin/nginx -s start #沒有start參數
nginx: invalid option: "-s start"
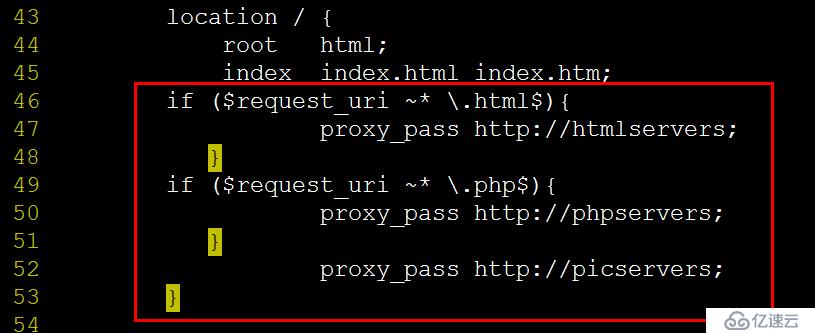
7)配置nginx成為分發器,實現動靜分離
[root@xuegod63 conf]# cd /server/nginx-1.8.0/conf #配置文件目錄
[root@xuegod63 conf]# cp nginx.conf nginx.conf.back #備份一下配置文件
[root@xuegod63 conf]# vim nginx.conf
[root@xuegod63 nginx-1.8.0]# vim /server/nginx-1.8.0/conf/nginx.conf #指定啟動nginx用戶
改:# user nobody;
為:user nginx nginx;
改:
43 location / {
44 root html;
45 index index.html index.htm; #在location / { 。。。} 中添加以下內容 #定義分發策略
index index.html index.htm;
if ($request_uri ~* \.html$){
proxy_pass http://htmlservers; #匹配到htm靜態類型訪問的都會轉到html服務池中
}
if ($request_uri ~* \.php$){
proxy_pass http://phpservers; #匹配到php動態類型文件直接在nginx服務器上解析了
}
}
如圖:
把一下內容注釋掉,匹配到php動態類型文件直接在nginx服務器上解析了,不再解析給后端服務器:
如圖:

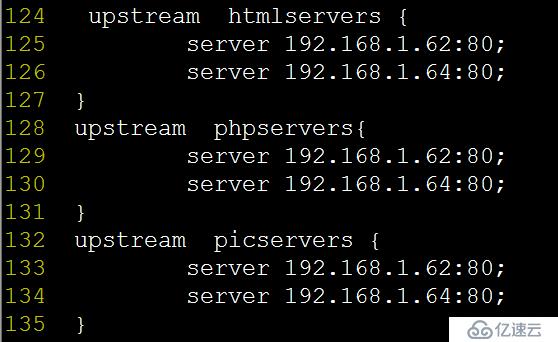
8)在配置文件nginx.conf的最后一行}前,添加以下內容:
upstream htmlservers { #定義靜態文件負載均衡服務器組名稱
server 192.168.1.62:80;
server 192.168.1.64:80;
}
upstream phpservers{ #定義動態文件負載均衡服務器組名稱
server 192.168.1.62:80;
server 192.168.1.64:80;
}
upstream picservers { #定義圖片文件負載均衡服務器組名稱
server 192.168.1.62:80;
server 192.168.1.64:80;
}
#后期工作中,根據工作中的需要,配置成具體業務的IP地址
如圖:
9)重新加載nginx服務器配置文件:
[root@xuegod63 conf]# /server/nginx-1.8.0/sbin/nginx -t
nginx: the configuration file /server/nginx-1.8.0/conf/nginx.conf syntax is ok
nginx: configuration file /server/nginx-1.8.0/conf/nginx.conf test is successful
[root@xuegod63 conf]# /server/nginx-1.8.0/sbin/nginx -s reload
2、配置后端服務器: xuegod62
(1)配置web服務器:
[root@xuegod62 html]# yum install httpd php -y
(2)生成靜態測試文件:
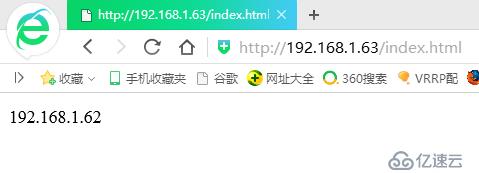
root@xuegod62 html]#echo 192.168.1.62 > /var/www/html/index.html
(3)生成動態測試文件:
[root@xuegod62 html]#vim /var/www/html/test.php #寫如以下內容:
192.168.1.62-php
<?php
phpinfo();
?>
(4)生成圖片文件: 上傳如下圖片,到“xuegod62網站/var/www/html/目錄下:

(5)啟動apache服務器:
[root@xuegod62 html]# service httpd restart
3、配置后端服務器:xuegod64
(1)配置web服務器:
[root@xuegod64 html]# yum install httpd php -y
(2)生成靜態測試文件:
[root@xuegod64 html]#echo 192.168.1.64 > /var/www/html/index.html
(3)生成動態測試文件:
[root@xuegod64 html]#vim /var/www/html/test.php #寫如以下內容:
192.168.1.64-php
<?php
phpinfo();
?>
(4)生成圖片文件: --上傳如下圖片,到“xuegod64網站/var/www/html/目錄下:

(5)重啟apache服務器
[root@xuegod64 html]# service httpd restart
4、測試
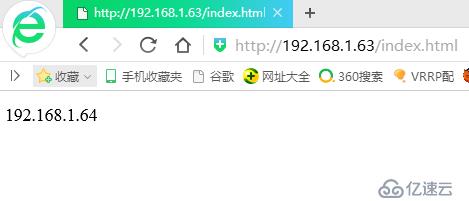
(1)測試負載均衡及動靜分離---靜態頁面:
=
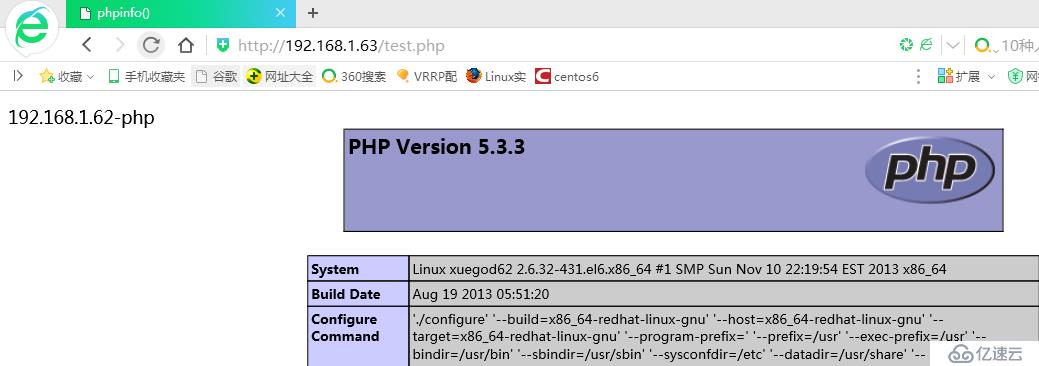
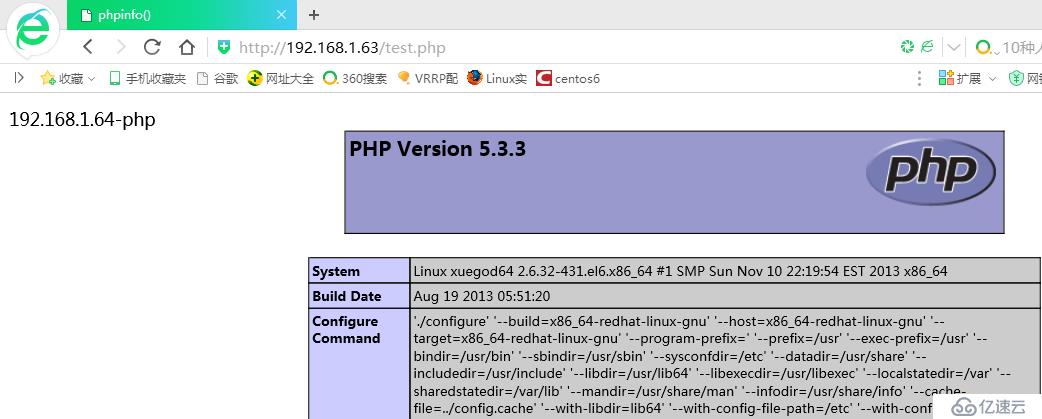
(2)測試動靜分離及負載均衡---動態頁面:
(3)測試圖片負載均衡:


(4)測試自動剔除壞的節點:
[root@xuegod64 html]# service httpd stop
http://192.168.1.63/pic.jpg

5、測試性能:
擴展: 文件打開數過多
[root@xuegod63 html]# ab -n 1000 -c 1000 http://192.168.1.62/index.html #運行正常
[root@xuegod63 html]# ab -n 2000 -c 2000 http://192.168.1.62/index.html #報錯
This is ApacheBench, Version 2.3 <$Revision: 655654 $>
Copyright 1996 Adam Twiss, Zeus Technology Ltd, http://www.zeustech.net/
Licensed to The Apache Software Foundation, http://www.apache.org/
Benchmarking 192.168.1.62 (be patient)
socket: Too many open files (24) # 測試時,一次打開的socket文件太多。
[root@xuegod63 ~]# ulimit -n
1024#系統默認一個進程最多同時允許打開1024的文件
[root@xuegod63 ~]# ulimit -n 10240 #修改默認允許同事打開10240個文件
[root@xuegod63 ~]# ab -n 2000 -c 2000 http://192.168.1.62/index.html
This is ApacheBench, Version 2.3 <$Revision: 655654 $>
Copyright 1996 Adam Twiss, Zeus Technology Ltd, http://www.zeustech.net/
Licensed to The Apache Software Foundation, http://www.apache.org/
Benchmarking 192.168.1.62 (be patient)
Completed 200 requests
Completed 400 requests
.......
Completed 1800 requests
Completed 2000 requests
Finished 2000 requests
Server Software: Apache/2.2.15
Server Hostname: 192.168.1.62
Server Port: 80
Document Path: /index.html
Document Length: 13 bytes
Concurrency Level: 2000
Time taken for tests: 1.119 seconds
Complete requests: 2000
Failed requests: 0
Write errors: 0
Total transferred: 560000 bytes
HTML transferred: 26000 bytes
Requests per second: 1787.69 [#/sec] (mean)
Time per request: 1118.765 [ms] (mean)
Time per request: 0.559 [ms] (mean, across all concurrent requests)
Transfer rate: 488.82 [Kbytes/sec] received
Connection Times (ms)
min mean[+/-sd] median max
Connect: 0 56 216.7 1 1062
Processing: 4 71 161.9 24 670
Waiting: 4 70 161.9 24 670
Total: 16 127 271.1 26 1087
Percentage of the requests served within a certain time (ms)
50% 26
66% 26
75% 27
80% 57
90% 717
95% 727
98% 1085
99% 1086
100% 1087 (longest request)
看了以上關于怎么樣使用nginx+Apache負載均衡及動靜分離 ,如果大家還有什么地方需要了解的可以在億速云行業資訊里查找自己感興趣的或者找我們的專業技術工程師解答的,億速云技術工程師在行業內擁有十幾年的經驗了。
免責聲明:本站發布的內容(圖片、視頻和文字)以原創、轉載和分享為主,文章觀點不代表本網站立場,如果涉及侵權請聯系站長郵箱:is@yisu.com進行舉報,并提供相關證據,一經查實,將立刻刪除涉嫌侵權內容。