您好,登錄后才能下訂單哦!
您好,登錄后才能下訂單哦!
小編給大家分享一下Android Studio3.5格式化布局代碼時錯位、錯亂bug怎么辦,希望大家閱讀完這篇文章之后都有所收獲,下面讓我們一起去探討吧!
更新到3.5版本后,格式化布局文件代碼,會自動給排序元素,導致界面布局錯亂
解決辦法:
設置 > code style > XML 右上角 Set from然后選擇Predefined Style...>Android即可
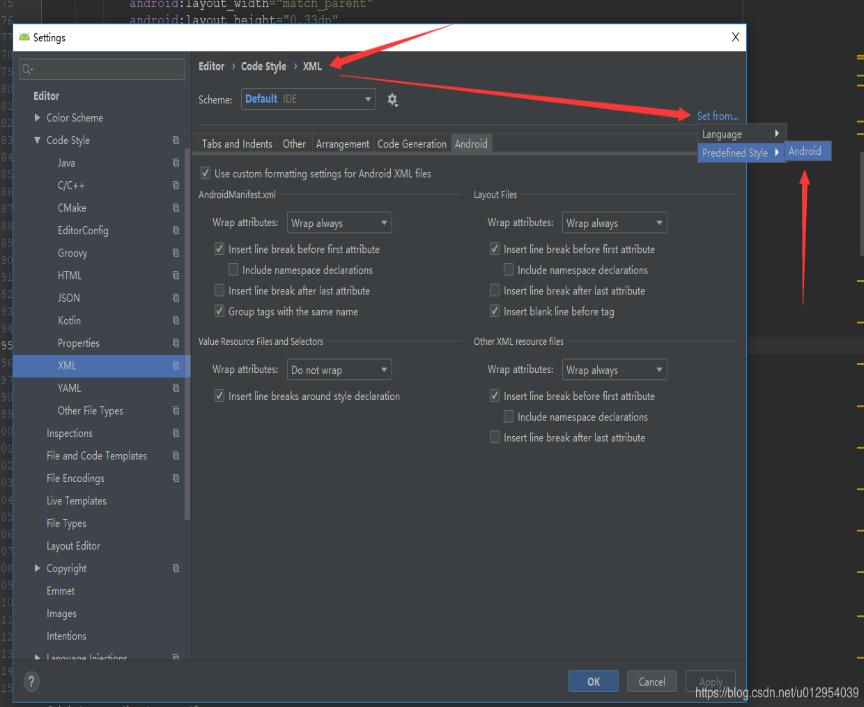
補充知識:Android Studio:Reformat Code格式化Xml布局代碼后控件順序錯亂
Android Studio升級3.5之后,遇到個奇葩問題,在布局xml文件中格式化代碼后,控件的順序都變了,這不是我們想要的結果,網上搜了一下,確實是AS3.5的鍋,每次升級都會遇到不同的問題,先記錄一下吧,以后有時間再研究為什么做的調整。
<?xml version="1.0" encoding="utf-8"?>
<LinearLayout xmlns:android="http://schemas.android.com/apk/res/android"
 xmlns:tools="http://schemas.android.com/tools"
 android:layout_width="match_parent"
 android:layout_height="match_parent"
 android:orientation="vertical"
 android:padding="16dp"
 tools:context="sun.geoffery.mvpdemo.MainActivity">

 <TextView
  android:id="@+id/text"
  android:layout_width="match_parent"
  android:layout_height="0dp"
  android:layout_weight="1"
  android:text="點擊按鈕獲取網絡數據" />

 <Button
  android:id="@+id/getData"
  android:layout_width="match_parent"
  android:layout_height="wrap_content"
  android:text="獲取數據【成功】" />

 <Button
  android:id="@+id/getDataForFailure"
  android:layout_width="match_parent"
  android:layout_height="wrap_content"
  android:text="獲取數據【失敗】" />

 <Button
  android:id="@+id/getDataForError"
  android:layout_width="match_parent"
  android:layout_height="wrap_content"
  android:text="獲取數據【異常】" />

</LinearLayout>
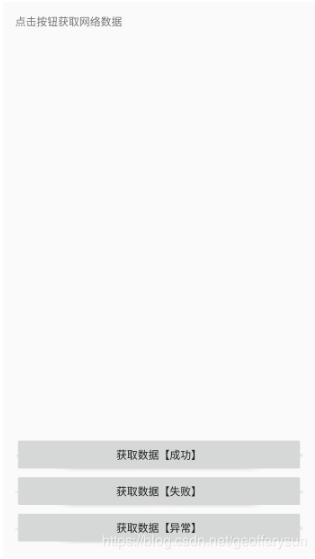
這個簡單的布局界面大致如下圖所示:
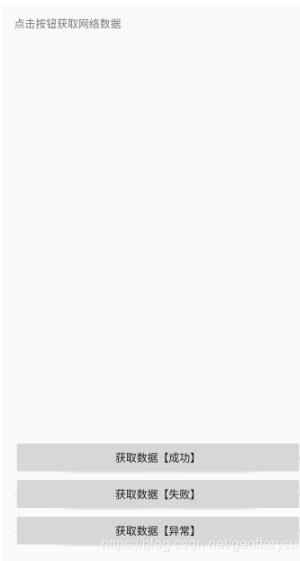
走你,Ctrl+Shift+F,格式化一把,再看我們的代碼:
<?xml version="1.0" encoding="utf-8"?>
<LinearLayout xmlns:android="http://schemas.android.com/apk/res/android"
 xmlns:tools="http://schemas.android.com/tools"
 android:layout_width="match_parent"
 android:layout_height="match_parent"
 android:orientation="vertical"
 android:padding="16dp"
 tools:context="sun.geoffery.mvpdemo.MainActivity">

 <Button
  android:id="@+id/getData"
  android:layout_width="match_parent"
  android:layout_height="wrap_content"
  android:text="獲取數據【成功】" />

 <Button
  android:id="@+id/getDataForFailure"
  android:layout_width="match_parent"
  android:layout_height="wrap_content"
  android:text="獲取數據【失敗】" />

 <Button
  android:id="@+id/getDataForError"
  android:layout_width="match_parent"
  android:layout_height="wrap_content"
  android:text="獲取數據【異常】" />

 <TextView
  android:id="@+id/text"
  android:layout_width="match_parent"
  android:layout_height="0dp"
  android:layout_weight="1"
  android:text="點擊按鈕獲取網絡數據" />

</LinearLayout>
原本最頂部的TextView被格式化到了最下面,一臉懵逼,界面如下:
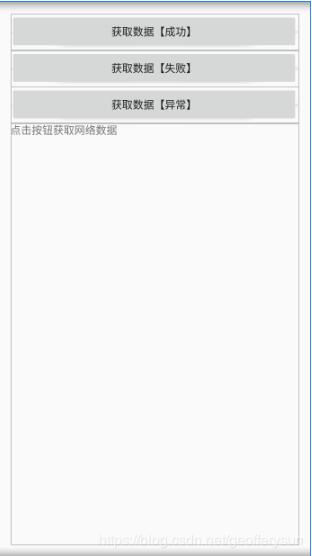
具體解決方法如下:
Settings–>Editor–> Code Style–>XML
點擊右上角的Set from->Predefined Style選擇Android后點擊OK保存,Perfect!
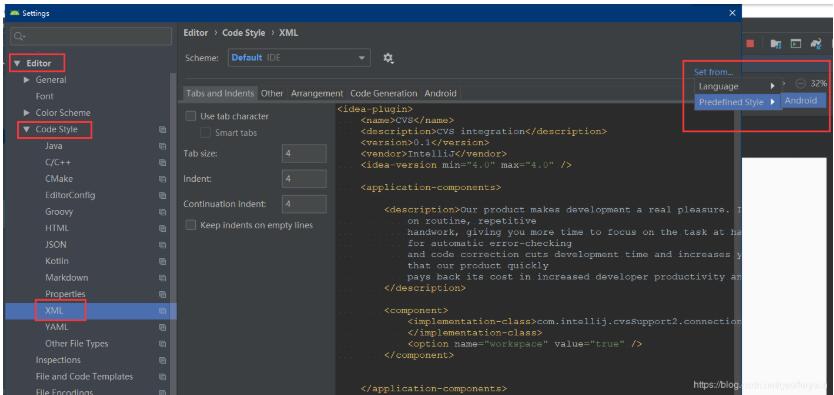
再格式化代碼,就是我們想要的效果了
看完了這篇文章,相信你對“Android Studio3.5格式化布局代碼時錯位、錯亂bug怎么辦”有了一定的了解,如果想了解更多相關知識,歡迎關注億速云行業資訊頻道,感謝各位的閱讀!
免責聲明:本站發布的內容(圖片、視頻和文字)以原創、轉載和分享為主,文章觀點不代表本網站立場,如果涉及侵權請聯系站長郵箱:is@yisu.com進行舉報,并提供相關證據,一經查實,將立刻刪除涉嫌侵權內容。