溫馨提示×
您好,登錄后才能下訂單哦!
點擊 登錄注冊 即表示同意《億速云用戶服務條款》
您好,登錄后才能下訂單哦!
這篇文章主要介紹了Spring Cloud基于zuul實現網關過程解析,文中通過示例代碼介紹的非常詳細,對大家的學習或者工作具有一定的參考學習價值,需要的朋友可以參考下
利用zuul網關統一向外暴露接口
1.新建項目 spring-zuul
2.引入pom
<dependency>
  <groupId>org.springframework.cloud</groupId>
  <artifactId>spring-cloud-starter-netflix-zuul</artifactId>
</dependency>
3.配置
spring:
 application:
  name: spring-zuul
 http:
  encoding:
   charset: UTF-8 #設置請求返回UTF-8編碼
   force: true
eureka:
 client:
  service-url:
   defaultZone: http://localhost:8761/eureka/
 instance:
  prefer-ip-address: true
server:
 port: 8082
4.啟動類注解
import org.springframework.boot.SpringApplication;
import org.springframework.boot.autoconfigure.SpringBootApplication;
import org.springframework.cloud.netflix.eureka.EnableEurekaClient;
import org.springframework.cloud.netflix.zuul.EnableZuulProxy;

@SpringBootApplication
@EnableEurekaClient
@EnableZuulProxy
public class SpringZuulApplication {

  public static void main(String[] args) {
    SpringApplication.run(SpringZuulApplication.class, args);
  }

}
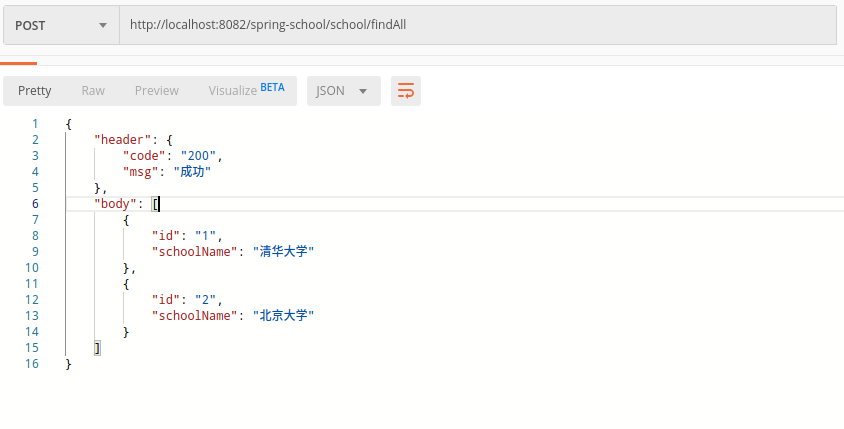
通過zuul中轉訪問各個業務微服務的url格式: {basePath}/{spring.application.name}/url
{basePath} : 網關zuul項目啟動后的路徑
{spring.application.name} 各個具體子系統的微服務名稱,即配置文件中配置的spring.application.name
url : 各個應用自定的的http接口。
測試:

完整代碼訪問: https://github.com/halouprogramer/spring-cloud-demo
以上就是本文的全部內容,希望對大家的學習有所幫助,也希望大家多多支持億速云。
免責聲明:本站發布的內容(圖片、視頻和文字)以原創、轉載和分享為主,文章觀點不代表本網站立場,如果涉及侵權請聯系站長郵箱:is@yisu.com進行舉報,并提供相關證據,一經查實,將立刻刪除涉嫌侵權內容。