您好,登錄后才能下訂單哦!
您好,登錄后才能下訂單哦!
本文介紹了使用C#創建Windows服務的實例代碼,分享給大家
一、開發環境
操作系統:Windows 10 X64
開發環境:VS2015
編程語言:C#
.NET版本:.NET Framework 4.0
目標平臺:X86
二、創建Windows Service
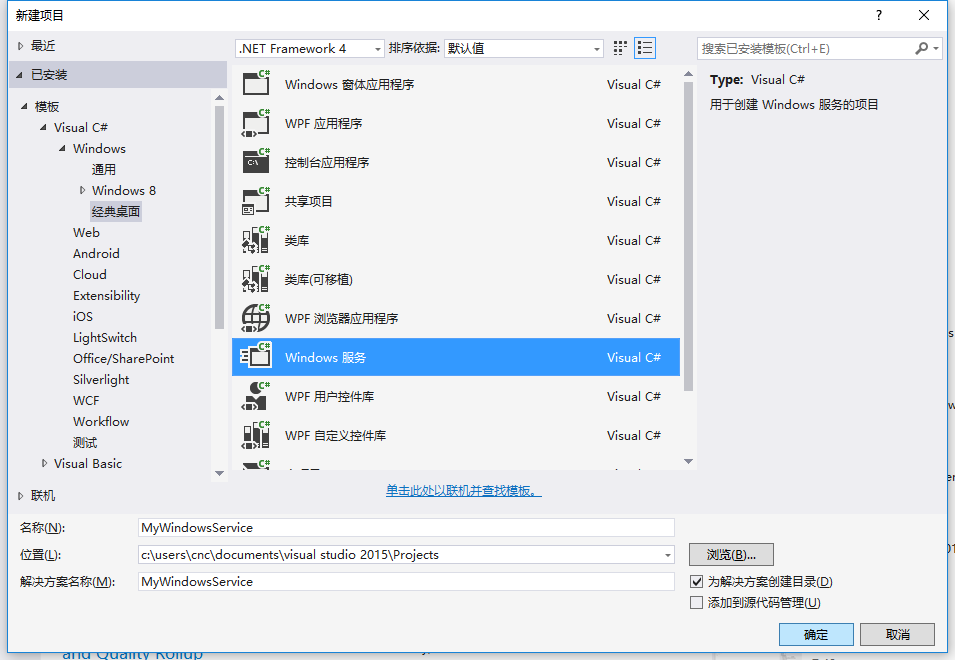
1、新建一個Windows Service,并將項目名稱改為“MyWindowsService”,如下圖所示:
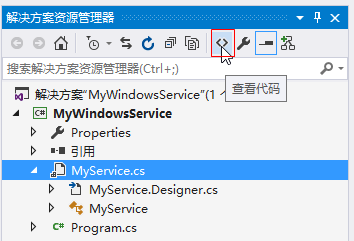
2、在解決方案資源管理器內將Service1.cs改為MyService1.cs后并點擊“查看代碼”圖標按鈕進入代碼編輯器界面,如下圖所示:
3、在代碼編輯器內如入以下代碼,如下所示:
using System;
using System.ServiceProcess;
using System.IO;

namespace MyWindowsService
{
  public partial class MyService : ServiceBase
  {
    public MyService()
    {
      InitializeComponent();
    }

    string filePath = @"D:\MyServiceLog.txt";

    protected override void OnStart(string[] args)
    {
      using (FileStream stream = new FileStream(filePath,FileMode.Append))
      using (StreamWriter writer = new StreamWriter(stream))
      {
        writer.WriteLine($"{DateTime.Now},服務啟動!");
      }
    }

    protected override void OnStop()
    {
      using (FileStream stream = new FileStream(filePath, FileMode.Append))
      using (StreamWriter writer = new StreamWriter(stream))
      {
        writer.WriteLine($"{DateTime.Now},服務停止!");
      }
    }
  }
}
4、雙擊項目“MyWindowsService”進入“MyService”設計界面,在空白位置右擊鼠標彈出上下文菜單,選中“添加安裝程序”,如下圖所示:

5、此時軟件會生成兩個組件,分別為“serviceInstaller1”及“serviceProcessInstaller1”,如下圖所示:

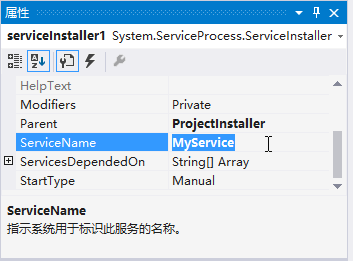
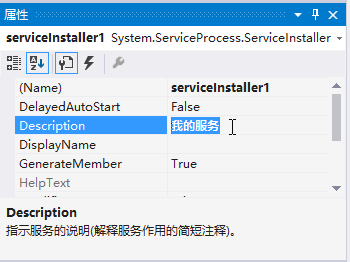
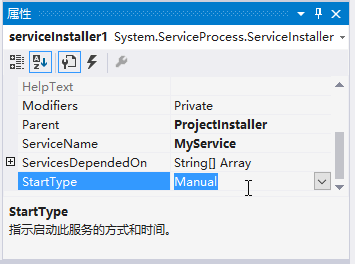
6、點擊“serviceInstaller1”,在“屬性”窗體將ServiceName改為MyService,Description改為我的服務,StartType保持為Manual,如下圖所示:
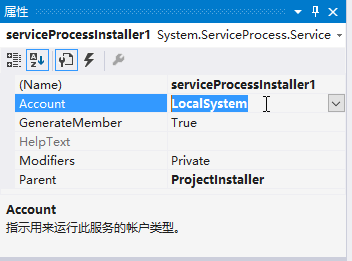
7、點擊“serviceProcessInstaller1”,在“屬性”窗體將Account改為LocalSystem(服務屬性系統級別),如下圖所示:
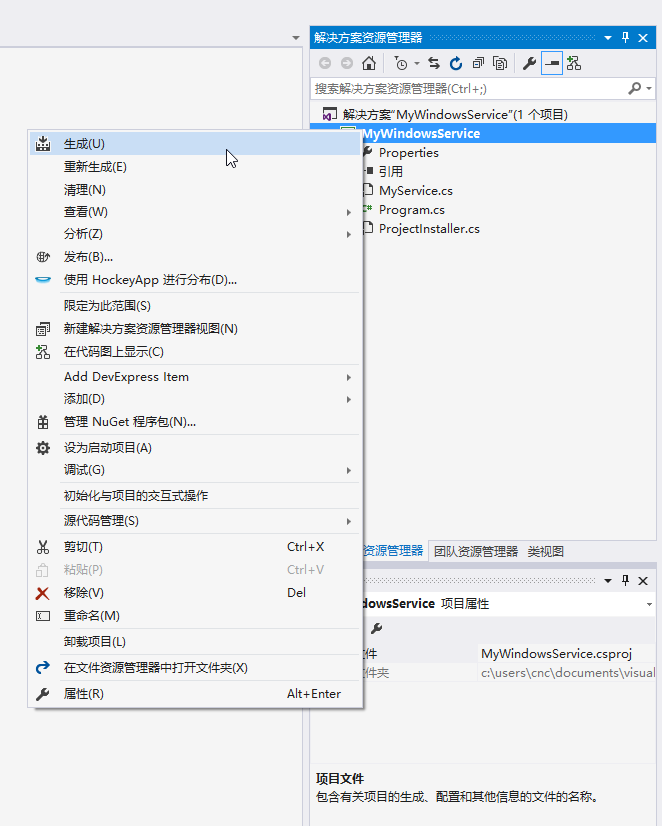
8、鼠標右鍵點擊項目“MyWindowsService”,在彈出的上下文菜單中選擇“生成”按鈕,如下圖所示:
9、至此,Windows服務已經創建完畢。
三、創建安裝、啟動、停止、卸載服務的Windows窗體
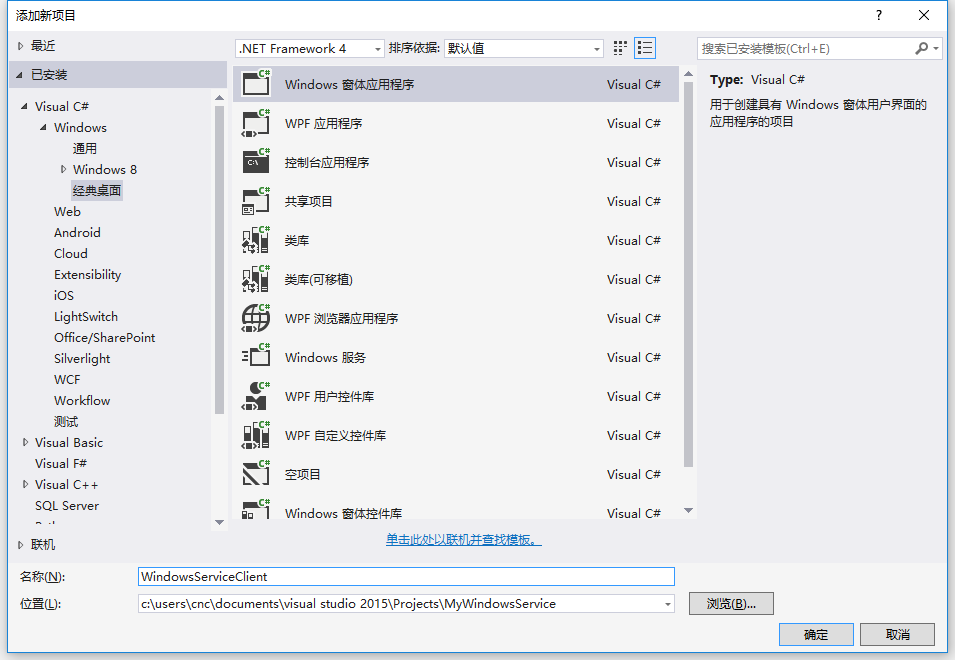
1、在同一個解決方案里新建一個Windows Form項目,并命名為WindowsServiceClient,如下圖所示:
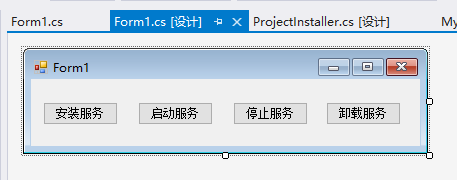
2、將該項目設置為啟動項目,并在窗體內添加四個按鈕,分別為安裝服務、啟動服務、停止服務及卸載服務,如下圖所示:
3、按下F7進入代碼編輯界面,引用“System.ServiceProcess”及“System.Configuration.Install”,并輸入如下代碼:
using System;
using System.Collections;
using System.Windows.Forms;
using System.ServiceProcess;
using System.Configuration.Install;

namespace WindowsServiceClient
{
  public partial class Form1 : Form
  {
    public Form1()
    {
      InitializeComponent();
    }
    string serviceFilePath = $"{Application.StartupPath}\\MyWindowsService.exe";
    string serviceName = "MyService";

    //事件:安裝服務
    private void button1_Click(object sender, EventArgs e)
    {
      if (this.IsServiceExisted(serviceName)) this.UninstallService(serviceName);
      this.InstallService(serviceFilePath);
    }

    //事件:啟動服務
    private void button2_Click(object sender, EventArgs e)
    {
      if (this.IsServiceExisted(serviceName)) this.ServiceStart(serviceName);
    }

    //事件:停止服務
    private void button4_Click(object sender, EventArgs e)
    {
      if (this.IsServiceExisted(serviceName)) this.ServiceStop(serviceName);
    }

    //事件:卸載服務
    private void button3_Click(object sender, EventArgs e)
    {
      if (this.IsServiceExisted(serviceName))
      {
        this.ServiceStop(serviceName);
        this.UninstallService(serviceFilePath);
      }
    }

    //判斷服務是否存在
    private bool IsServiceExisted(string serviceName)
    {
      ServiceController[] services = ServiceController.GetServices();
      foreach (ServiceController sc in services)
      {
        if (sc.ServiceName.ToLower() == serviceName.ToLower())
        {
          return true;
        }
      }
      return false;
    }

    //安裝服務
    private void InstallService(string serviceFilePath)
    {
      using (AssemblyInstaller installer = new AssemblyInstaller())
      {
        installer.UseNewContext = true;
        installer.Path = serviceFilePath;
        IDictionary savedState = new Hashtable();
        installer.Install(savedState);
        installer.Commit(savedState);
      }
    }

    //卸載服務
    private void UninstallService(string serviceFilePath)
    {
      using (AssemblyInstaller installer = new AssemblyInstaller())
      {
        installer.UseNewContext = true;
        installer.Path = serviceFilePath;
        installer.Uninstall(null);
      }
    }
    //啟動服務
    private void ServiceStart(string serviceName)
    {
      using (ServiceController control = new ServiceController(serviceName))
      {
        if (control.Status == ServiceControllerStatus.Stopped)
        {
          control.Start();
        }
      }
    }

    //停止服務
    private void ServiceStop(string serviceName)
    {
      using (ServiceController control = new ServiceController(serviceName))
      {
        if (control.Status == ServiceControllerStatus.Running)
        {
          control.Stop();
        }
      }
    }
  }
}
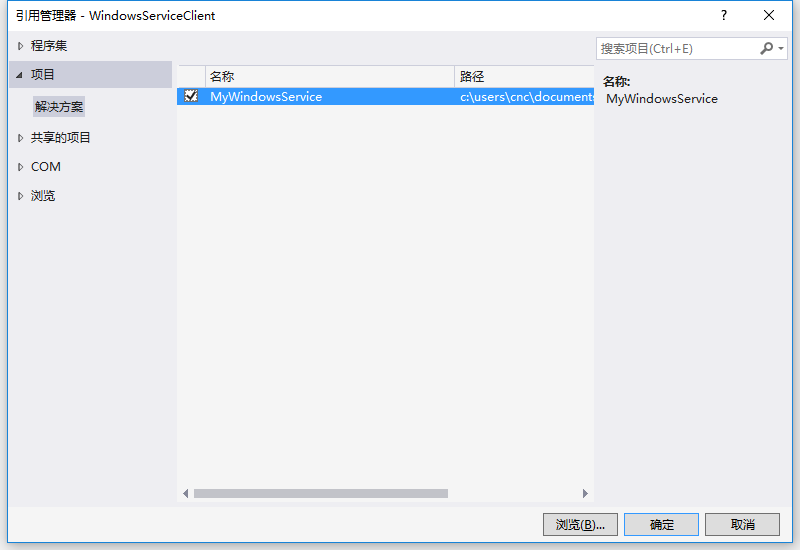
4、為了后續調試服務及安裝卸載服務的需要,將已生成的MyWindowsService.exe引用到本Windows窗體,如下圖所示:
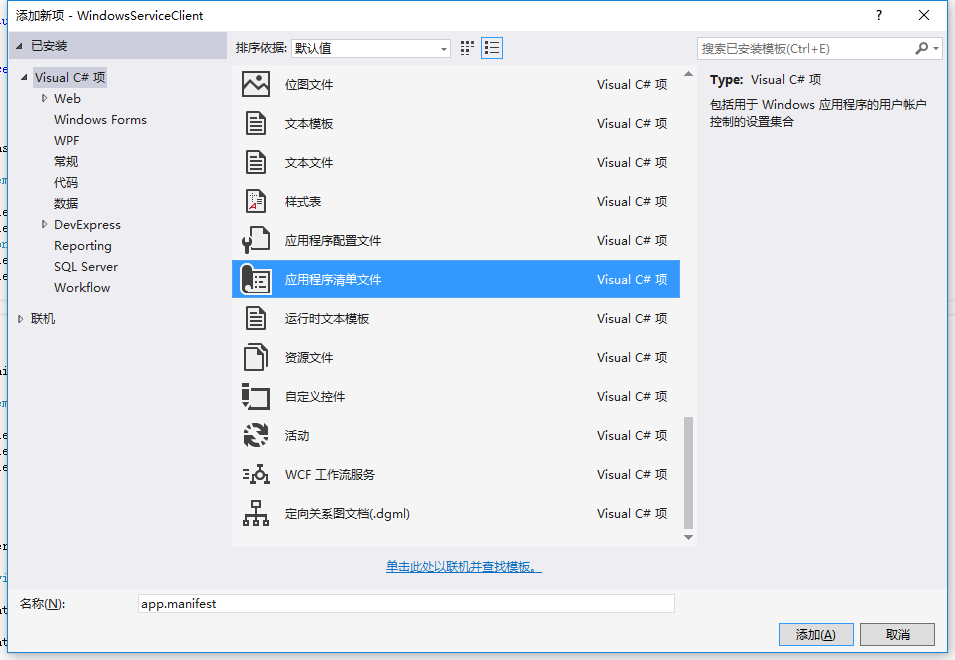
5、由于需要安裝服務,故需要使用UAC中Administrator的權限,鼠標右擊項目“WindowsServiceClient”,在彈出的上下文菜單中選擇“添加”->“新建項”,在彈出的選擇窗體中選擇“應用程序清單文件”并單擊確定,如下圖所示:
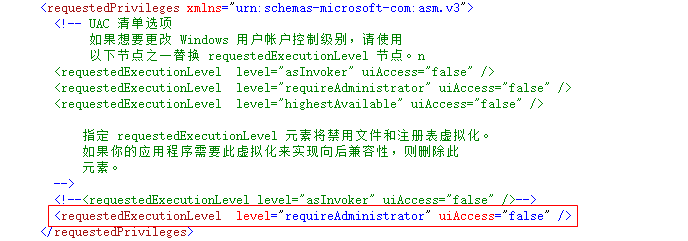
6、打開該文件,并將<requestedExecutionLevel level="asInvoker" uiAccess="false" />改為<requestedExecutionLevel level="requireAdministrator" uiAccess="false" />,如下圖所示:
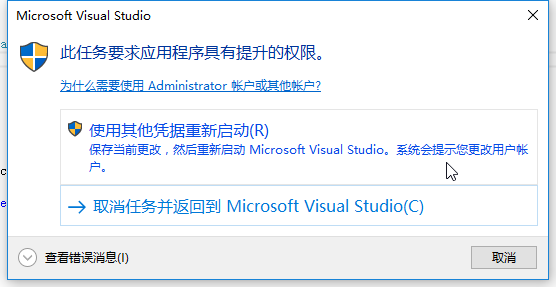
7、IDE啟動后,將會彈出如下所示的窗體(有的系統因UAC配置有可能不顯示),需要用管理員權限打開:
8、重新打開后,在IDE運行WindowsServiceClient項目;
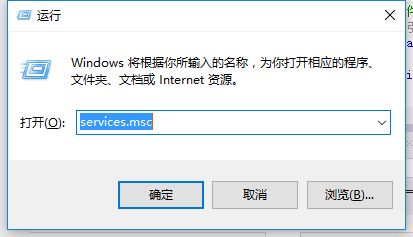
9、使用WIN+R的方式打開運行窗體,并在窗體內輸入services.msc后打開服務,如下圖所示:
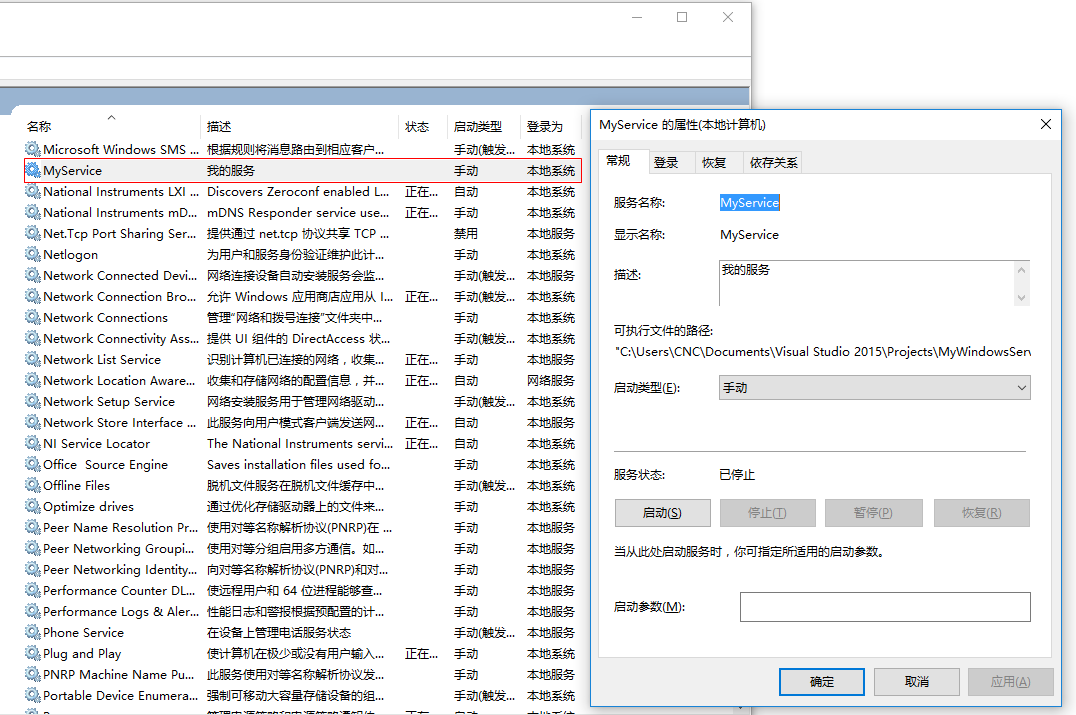
10、點擊窗體內的“安裝服務”按鈕,將會在服務中出現MyService,如下圖所示:
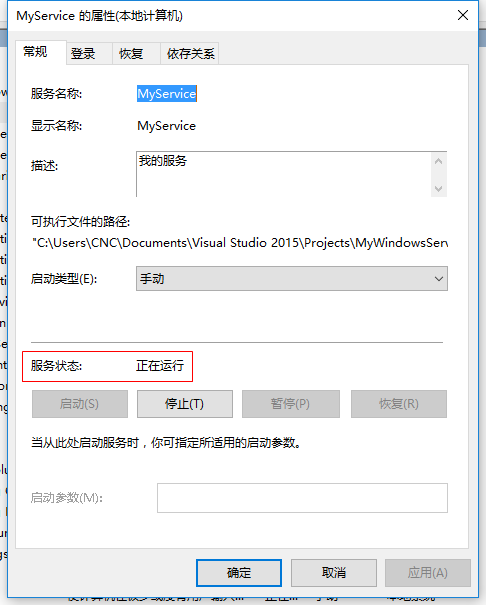
11、點擊“運行服務”按鈕,將啟動并運行服務,如下所示:
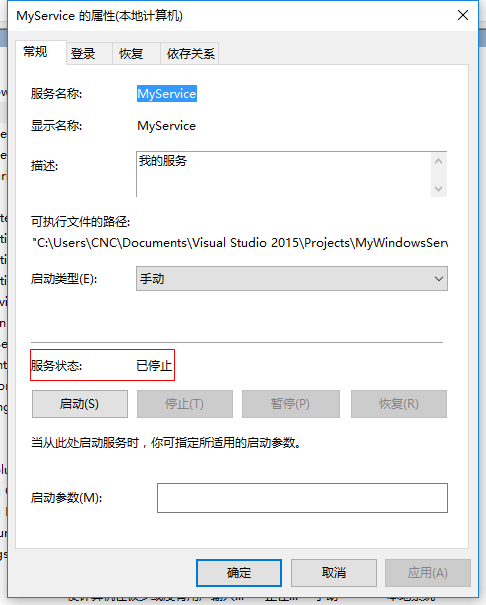
12、點擊“停止服務”按鈕,將會停止運行服務,如下圖所示:
13、點擊“卸載服務”按鈕,將會從服務中刪除MyService服務。
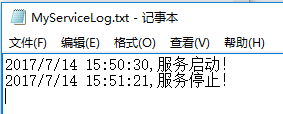
14、以上啟動及停止服務將會寫入D:\MyServiceLog.txt,內容如下所示:
源代碼下載:MyWindowsService_jb51.rar
補充:如何調試服務
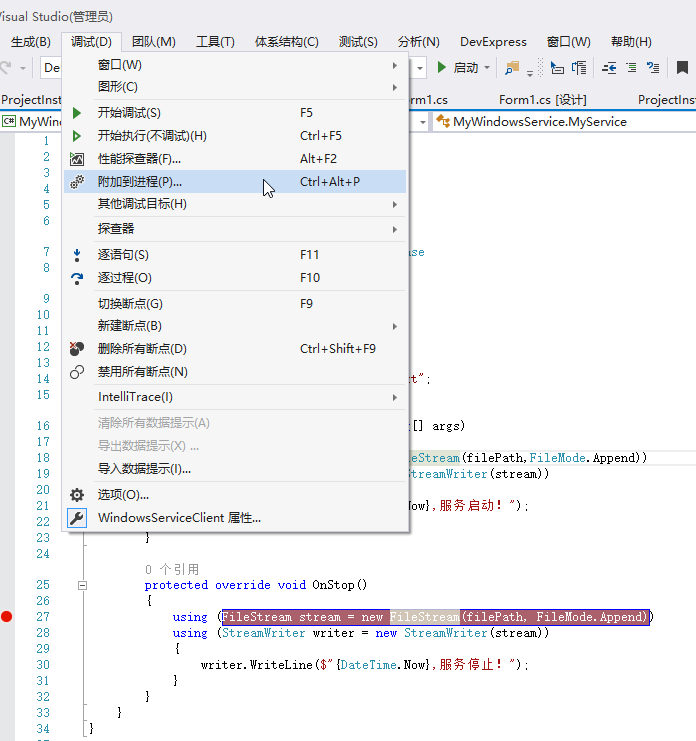
1、要調試服務,其實很簡單,如需將服務附加進程到需要調試的項目里面即可,假如要調試剛才建的服務,現在OnStop事件里設置斷點,如下所示:

2、啟動“WindowsServiceClient”項目,在“調試”菜單中選擇“附件到進程”(服務必須事先安裝),如下所示:
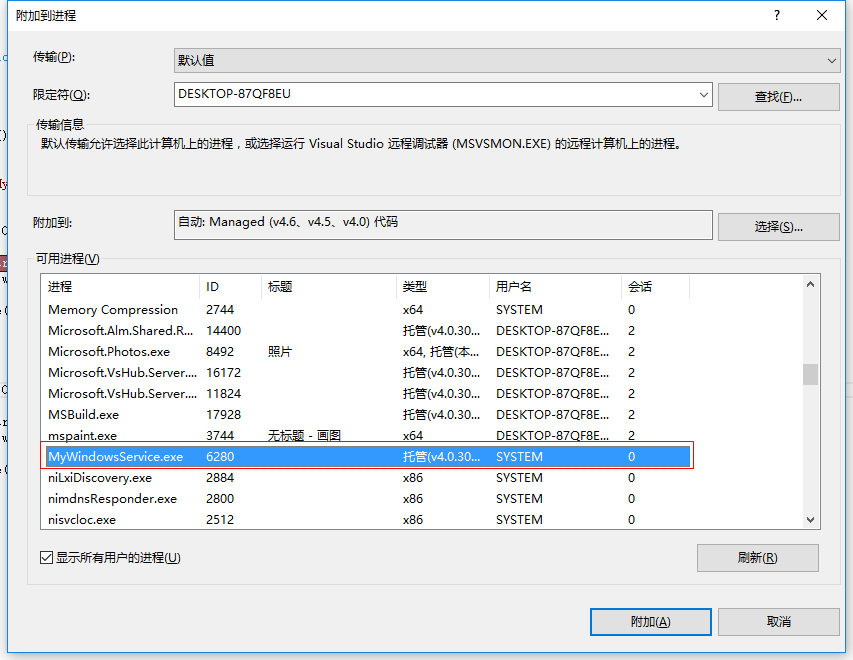
3、找到“MyWindowsService.exe”,點擊“附加”按鈕,如下圖所示:
4、點擊“停止服務”按鈕,程序將會在設置斷點的地方中斷,如下圖所示:

以上就是本文的全部內容,希望對大家的學習有所幫助,也希望大家多多支持億速云。
免責聲明:本站發布的內容(圖片、視頻和文字)以原創、轉載和分享為主,文章觀點不代表本網站立場,如果涉及侵權請聯系站長郵箱:is@yisu.com進行舉報,并提供相關證據,一經查實,將立刻刪除涉嫌侵權內容。