溫馨提示×
您好,登錄后才能下訂單哦!
點擊 登錄注冊 即表示同意《億速云用戶服務條款》
您好,登錄后才能下訂單哦!
本文實例講述了微信小程序實現的canvas合成圖片功能。分享給大家供大家參考,具體如下:
先要獲取圖片的信息 然后將需要合成的內容用canvas繪制出來,得到一個合成好的畫布,接下來用 wx.canvasToTempFilePath 把當前畫布指定區域的內容導出生成指定大小的圖片,并返回文件路徑。這個時候的路徑 是微信的臨時路徑,瀏覽器是訪問不了的,因此需要請求服務器 用 wx.uploadFile 將本地資源上傳到開發者服務器。
在頁面的wxml中加入canvas組件如下:
<view class="canvasBox">
 <canvas canvas-id="shareCanvas" ></canvas>
</view>
在js中
picture: function () { //生成圖片
   let that = this;
   let p1 = new Promise(function (resolve, reject) {
    wx.getImageInfo({
     src: 圖片路徑,
     success(res) {
      resolve(res);
     }
    })
   }).then(res => {
    const ctx = wx.createCanvasContext('shareCanvas');
    ctx.drawImage(res.path, 0, 0, 375, 300);  //繪制背景圖
    //ctx.setTextAlign('center')  // 文字居中
    ctx.setFillStyle('#000000') // 文字顏色:黑色
    ctx.setFontSize(20)     // 文字字號:22px
    ctx.fillText("文本內容", 20, 70) //開始繪制文本的 x/y 坐標位置(相對于畫布)
    ctx.stroke();//stroke() 方法會實際地繪制出通過 moveTo() 和 lineTo() 方法定義的路徑。默認顏色是黑色
    ctx.draw(false, that.drawPicture());//draw()的回調函數
    console.log(res.path);
   })
  },
  drawPicture: function () { //生成圖片
    var that = this;
   setTimeout(function(){
    wx.canvasToTempFilePath({ //把當前畫布指定區域的內容導出生成指定大小的圖片,并返回文件路徑
     x: 0,
     y: 0,
     width: 375,
     height: 300,
     destWidth: 750, //輸出的圖片的寬度(寫成width的兩倍,生成的圖片則更清晰)
     destHeight: 600,
     canvasId: 'shareCanvas',
     success: function (res) {
      console.log(res);
      that.draw_uploadFile(res);
     },
    })
   },300)
  },
  draw_uploadFile: function (r) { //wx.uploadFile 將本地資源上傳到開發者服務器
   let that = this;
   wx.uploadFile({
    url: 圖片上傳接口, //線上接口
    filePath: r.tempFilePath,
    name: 'imgFile',
    success: function (res) {
     console.log(res);
     if(res.statusCode==200){
      res.data = JSON.parse(res.data);
      let imgsrc = res.data.data.src;
      that.setData({
       imgPath: imgsrc
      });
     }else{
      console.log('失敗')
     }
    },
   })
  },
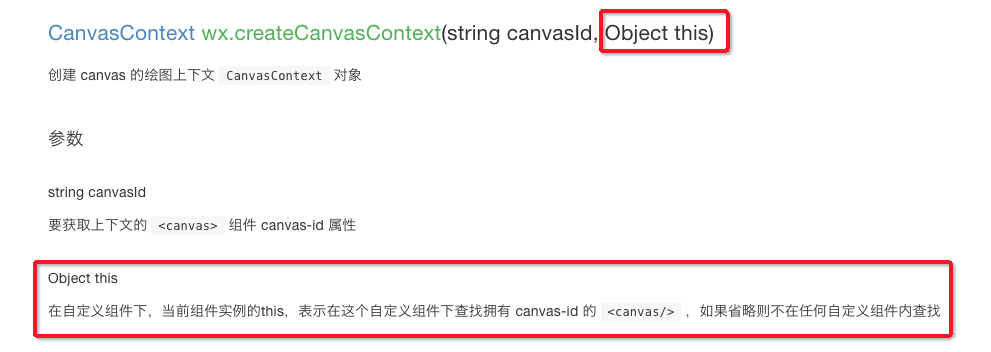
注意:若是將此方法寫成自定義組件,則 wx.createCanvasContext 和 wx.canvasToTempFilePath 都需要多傳一個this,

因在自定義組件下,當前組件實例的this,用以操作組件內 <canvas/> 組件。
至于分享的話 ,拿到服務器返回的圖片路徑之后 就可以用來寫分享的圖片路徑了
希望本文所述對大家微信小程序開發有所幫助。
免責聲明:本站發布的內容(圖片、視頻和文字)以原創、轉載和分享為主,文章觀點不代表本網站立場,如果涉及侵權請聯系站長郵箱:is@yisu.com進行舉報,并提供相關證據,一經查實,將立刻刪除涉嫌侵權內容。