您好,登錄后才能下訂單哦!
您好,登錄后才能下訂單哦!
(一)、簡介
git的有點
1、git是分布式的,svn不是
git分布式本地就可以用,可以隨便保存各種歷史痕跡,不用擔心污染服務器,連不上服務器也能提交代碼、查看log。
2、GIT分支和SVN的分支不同
分支在SVN中實際上是版本庫中的一份copy,而git一個倉庫是一個快照,所以git 切換、合并分支等操作更快速。
3、git有一個強大的代碼倉庫管理系統 - gitlab
可以很方便的管理權限、代碼review,創建、管理project
GitLab 是一個用于倉庫管理系統的開源項目,使用Git作為代碼管理工具,并在此基礎上搭建起來的web服務。可通過Web界面進行訪問公開的或者私人項目。它擁有與Github類似的功能,能夠瀏覽源代碼,管理缺陷和注釋。可以管理團隊對倉庫的訪問,它非常易于瀏覽提交過的版本并提供一個文件歷史庫。團隊成員可以利用內置的簡單聊天程序(Wall)進行交流。它還提供一個代碼片段收集功能可以輕松實現代碼復用。
版本:GitLab 分為社區版(CE) 和企業版(EE)
(二)、安裝
方法一:通過yum源進行安裝
1、配置yum源
[root@otrs004097 ~]# cat /etc/yum.repos.d/gitlab-ce.repo
[gitlab-ce]
name=Gitlab CE Repository
baseurl=https://mirrors.tuna.tsinghua.edu.cn/gitlab-ce/yum/el$releasever/
gpgcheck=0
enabled=1
2、更新本地yum緩存
sudo yum makecache
3、安裝GitLab社區版
sudo yum install gitlab-ce #自動安裝最新版
sudo yum install gitlab-ce-x.x.x #安裝指定版本
4、GitLab常用命令
sudo gitlab-ctl start # 啟動所有 gitlab 組件;
sudo gitlab-ctl stop # 停止所有 gitlab 組件;
sudo gitlab-ctl restart # 重啟所有 gitlab 組件;
sudo gitlab-ctl status # 查看服務狀態;
sudo gitlab-ctl reconfigure # 啟動服務;
sudo vim /etc/gitlab/gitlab.rb # 修改默認的配置文件;
gitlab-rake gitlab:check SANITIZE=true --trace # 檢查gitlab;
sudo gitlab-ctl tail # 查看日志;
方法二:通過rpm包安裝
gitlab通過下載rpm包集成了它所需要的軟件,簡化安裝步驟,rpm包可以從官網上或清華鏡像源獲取https://mirrors.tuna.tsinghua.edu.cn/gitlab-ce/yum/el7/. 下載最新的版本:https://mirrors.tuna.tsinghua.edu.cn/gitlab-ce/yum/el7/gitlab-ce-12.4.2-ce.0.el7.x86_64.rpm
[root@otrs004097 opt]# wget https://mirrors.tuna.tsinghua.edu.cn/gitlab-ce/yum/el7/gitlab-ce-12.4.2-ce.0.el7.x86_64.rpm
[root@otrs004097 opt]# rpm -ivh gitlab-ce-12.4.2-ce.0.el7.x86_64.rpm
或者
[root@otrs004097 opt]#yum localinstall -y gitlab-ce-12.4.2-ce.0.el7.x86_64.rpm
(三)、修改配置文件。
[root@otrs004097 ~]# vim /etc/gitlab/gitlab.rb
external_url 'http://192.168.4.97'
[root@otrs004097 ~]# gitlab-ctl reconfigure #####重新加載配置
注意要保留8080端口否則會報錯的。可以修改下邊的配置文件 vim /var/opt/gitlab/gitlab-rails/etc/unicorn.rb
listen "127.0.0.1:8080", :tcp_nopush => true
重置成功后就可以登錄網頁 了。
備注:gitlab的守護進程是會默認開啟nginx的,如果想要關閉,可以嘗試一下操作
gitlab-ctl stop nginx
gitlab-ctl restart nginx
如果想要釋放資源,關閉gitlab時,可以嘗試一下操作
gitlab-ctl stop
(四)、gitlab的使用
1、登錄gitlab,在瀏覽器里輸入相關的信息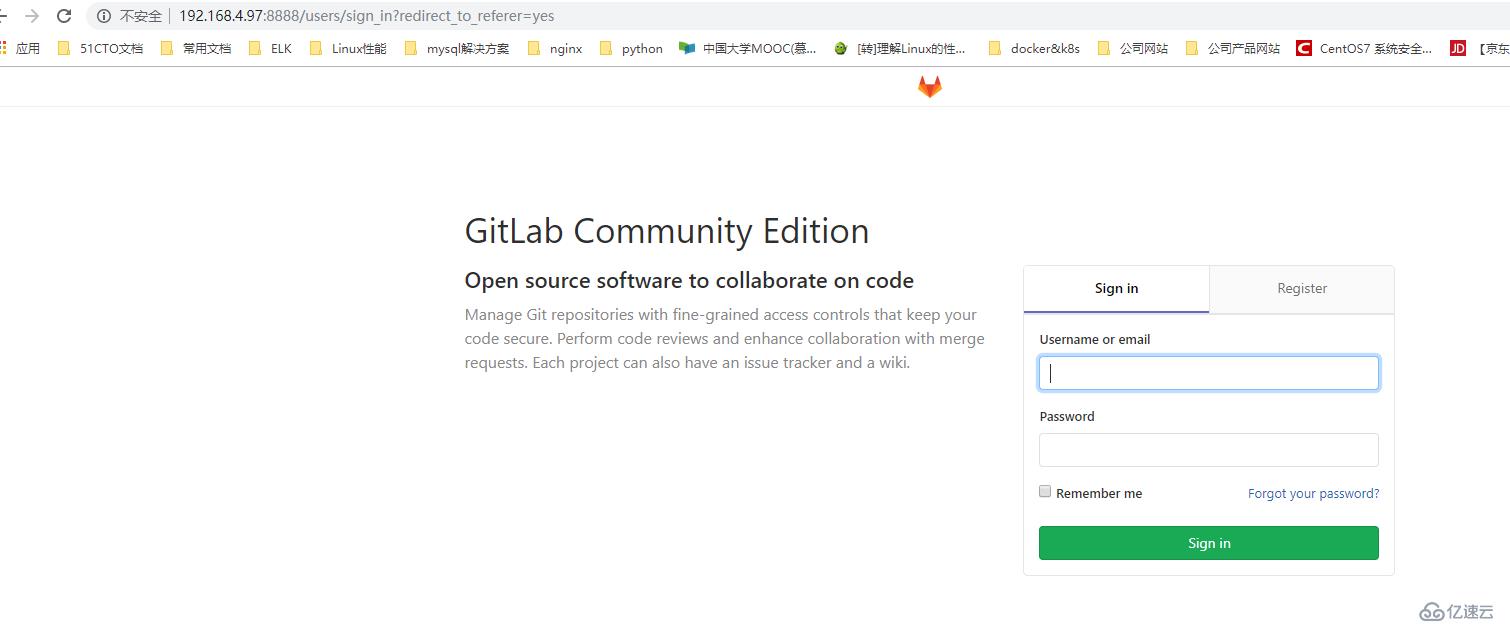
2、默認的賬號為:root,密碼是剛才重置的。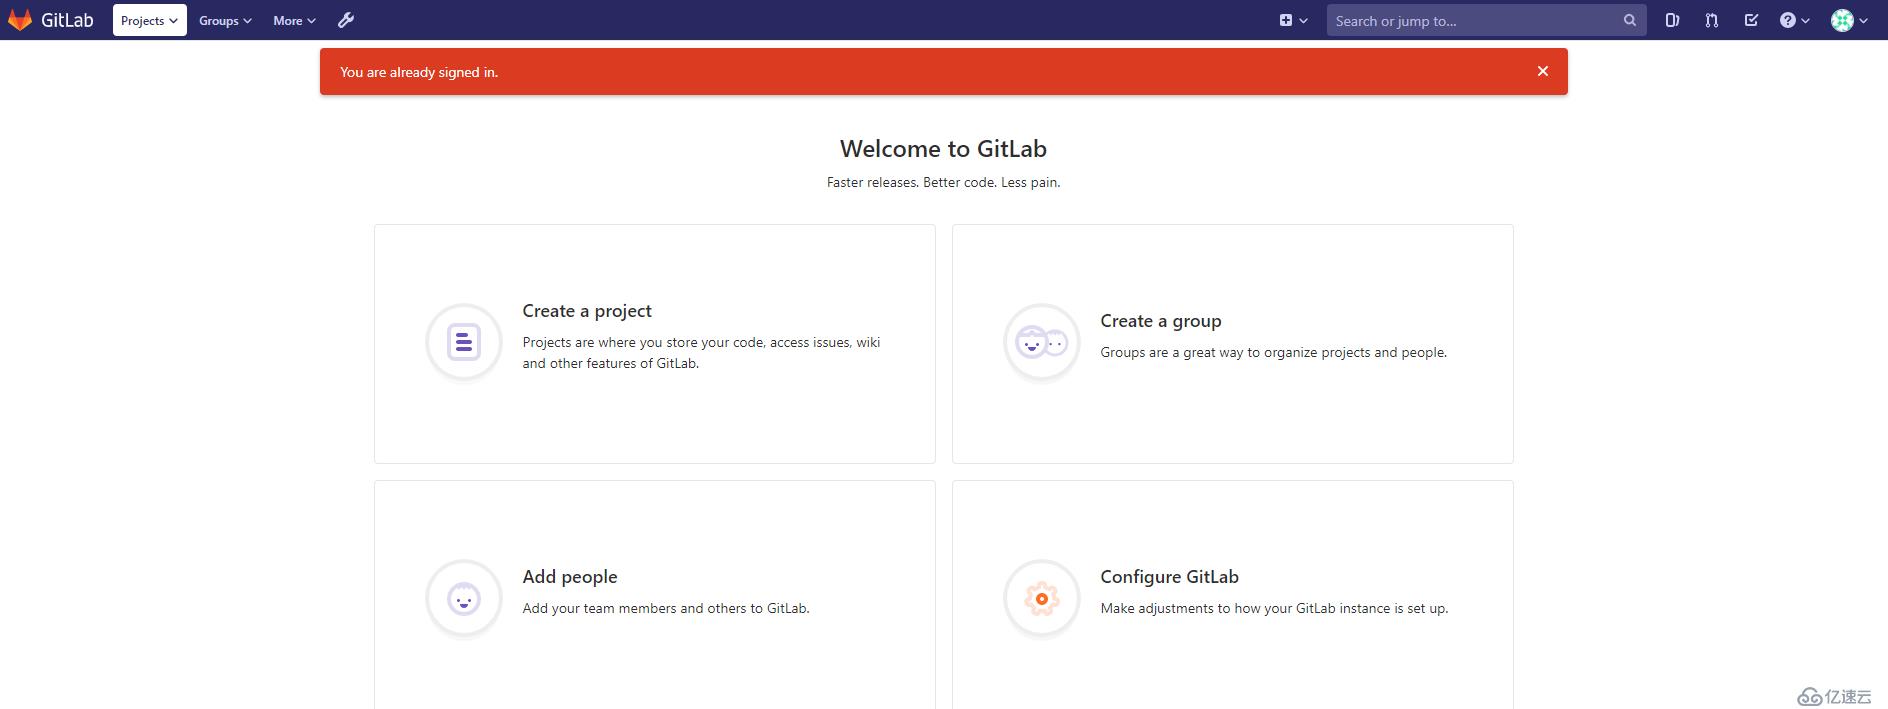
3、安裝Git工具linux:安裝Git,使用自帶的源安裝。
[root@otrs004097 opt]# yum install git -y
4、生成密鑰文件,使用ssh-keygen生成密鑰文件.ssh/id_rsa.pub.
[root@otrs004097 opt]# ssh-keygen
Generating public/private rsa key pair.
Enter file in which to save the key (/root/.ssh/id_rsa):
Enter passphrase (empty for no passphrase):
Enter same passphrase again:
Your identification has been saved in /root/.ssh/id_rsa.
Your public key has been saved in /root/.ssh/id_rsa.pub.
The key fingerprint is:
SHA256:at+BXYp8LPxfZ6U00BssEFb1LhvnyphuhFpOyRYYBMo root@otrs004097
The key's randomart image is:
+---[RSA 2048]----+
|      .o. +o...  |
|   . .  .. . o . |
|    E    o  o + .|
|        . .  o + |
|        S. +. * +|
|       + =Bo.. O.|
|      o ***.  + +|
|     . ..=...= + |
|        . o+= o  |
+----[SHA256]-----+
5、在gitlab主頁中新建一個project。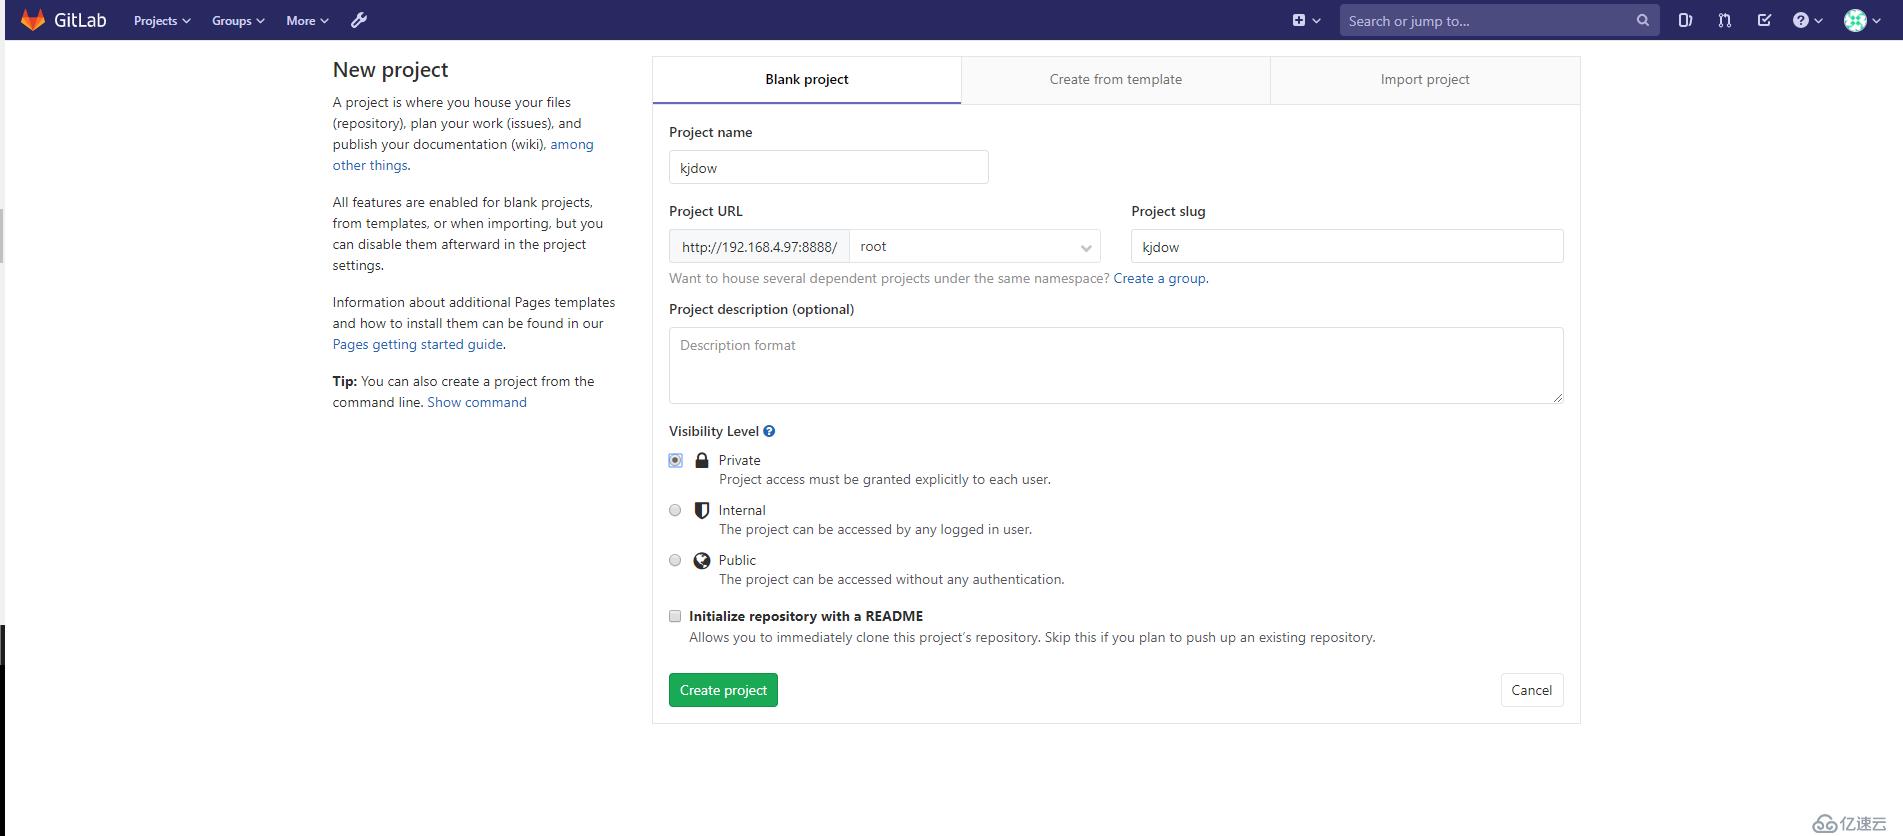
6、客戶端生成密鑰文件
[root@DEV004021 ~]# cat /root/.ssh/id_rsa.pub
ssh-rsa AAAAB3NzaC1yc2EAAAADAQABAAABAQDjYPFEWZ/TqT750fQnsoYgzVtjp9NyT3dVPF8BnUJ8coDQLixoYFevXeWbOhECoYI5ekY/6PgLjy3yVJ8uX3BitluHybttO3QhtvmNVRhHTilSyX2c6fxDMIouD08Xnda1w3I9mD8SD+Xg/OCy/8V+QWpfvC1D+oU6Hkt9UyEKgxZ5hnInnc4dWJgpuGsHKa2Hqrr3VImPaSeJ1xVuYl8jsxQjSa1+zIzDbfM0NLCfT/1FGPLCJ4kjOKTFIv3AHn3y9hwTs1H1RrE5bv5H4fNpjG1GsOGKw9MxSP2mV9RHhOI4ItiMK0NNNrZVVa+Lgs50/8s9cn3tWzaHiXNWPEWR root@DEV004021
將公鑰復制到gitlab中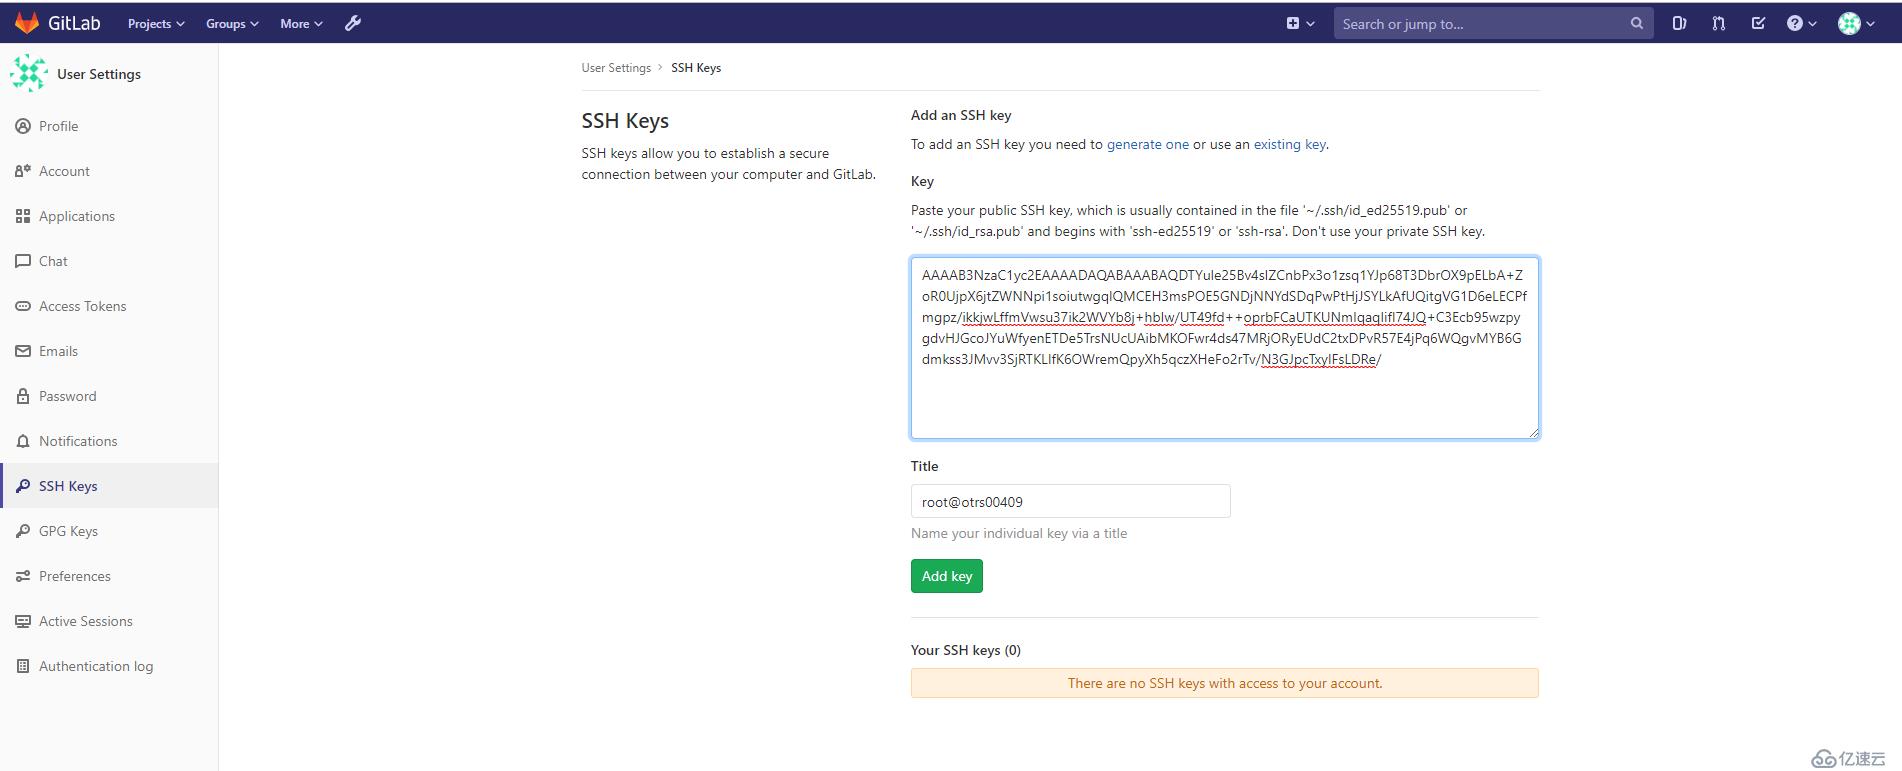
查看ssh key添加完成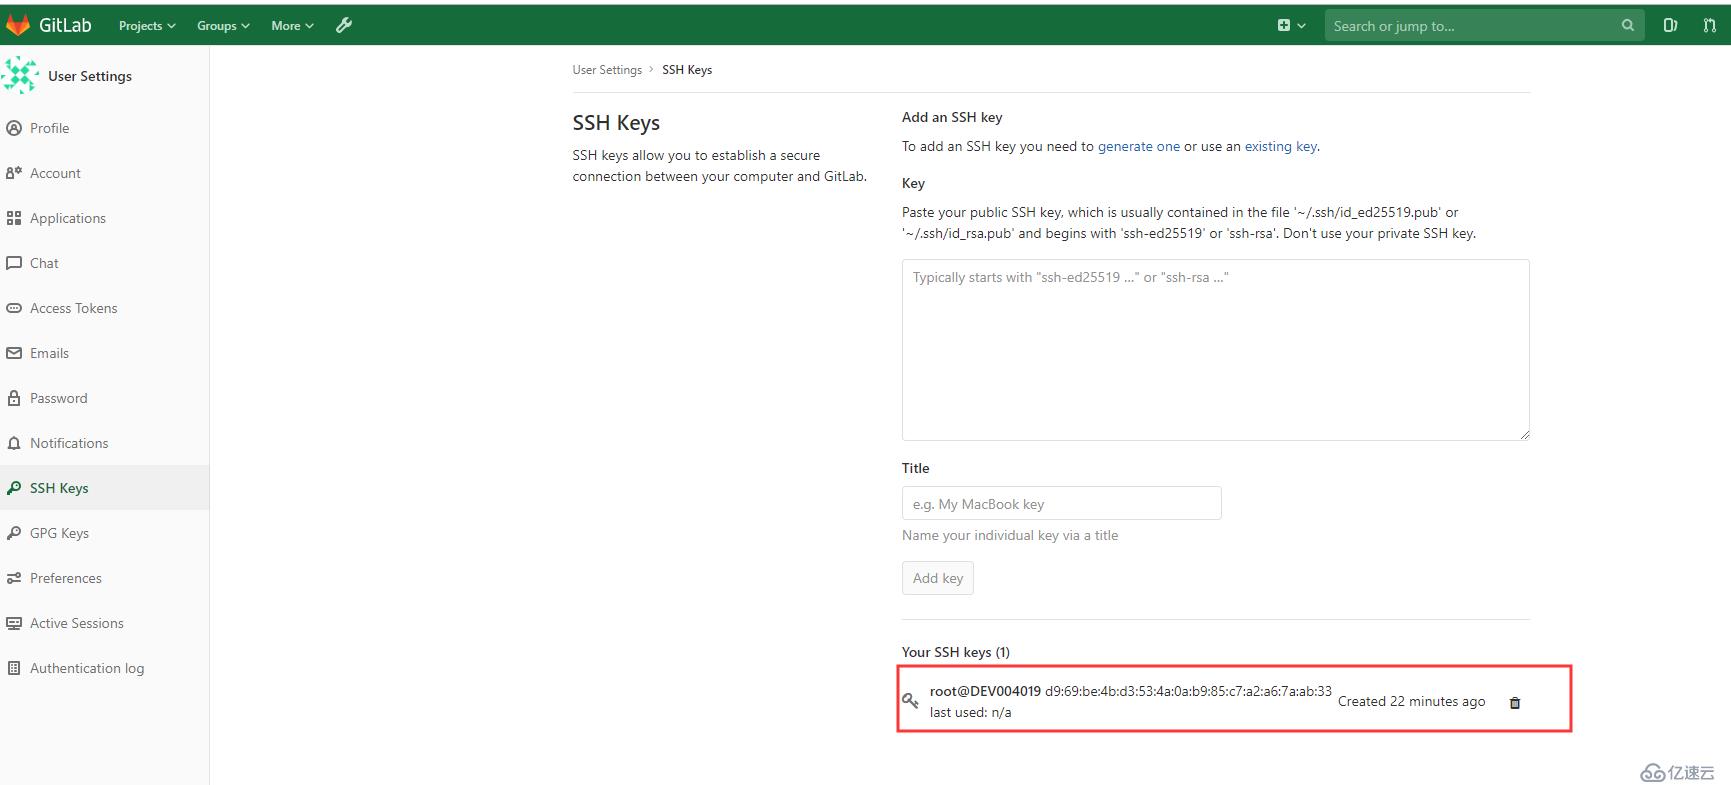
7、點擊項目,查看ssh地址和http地址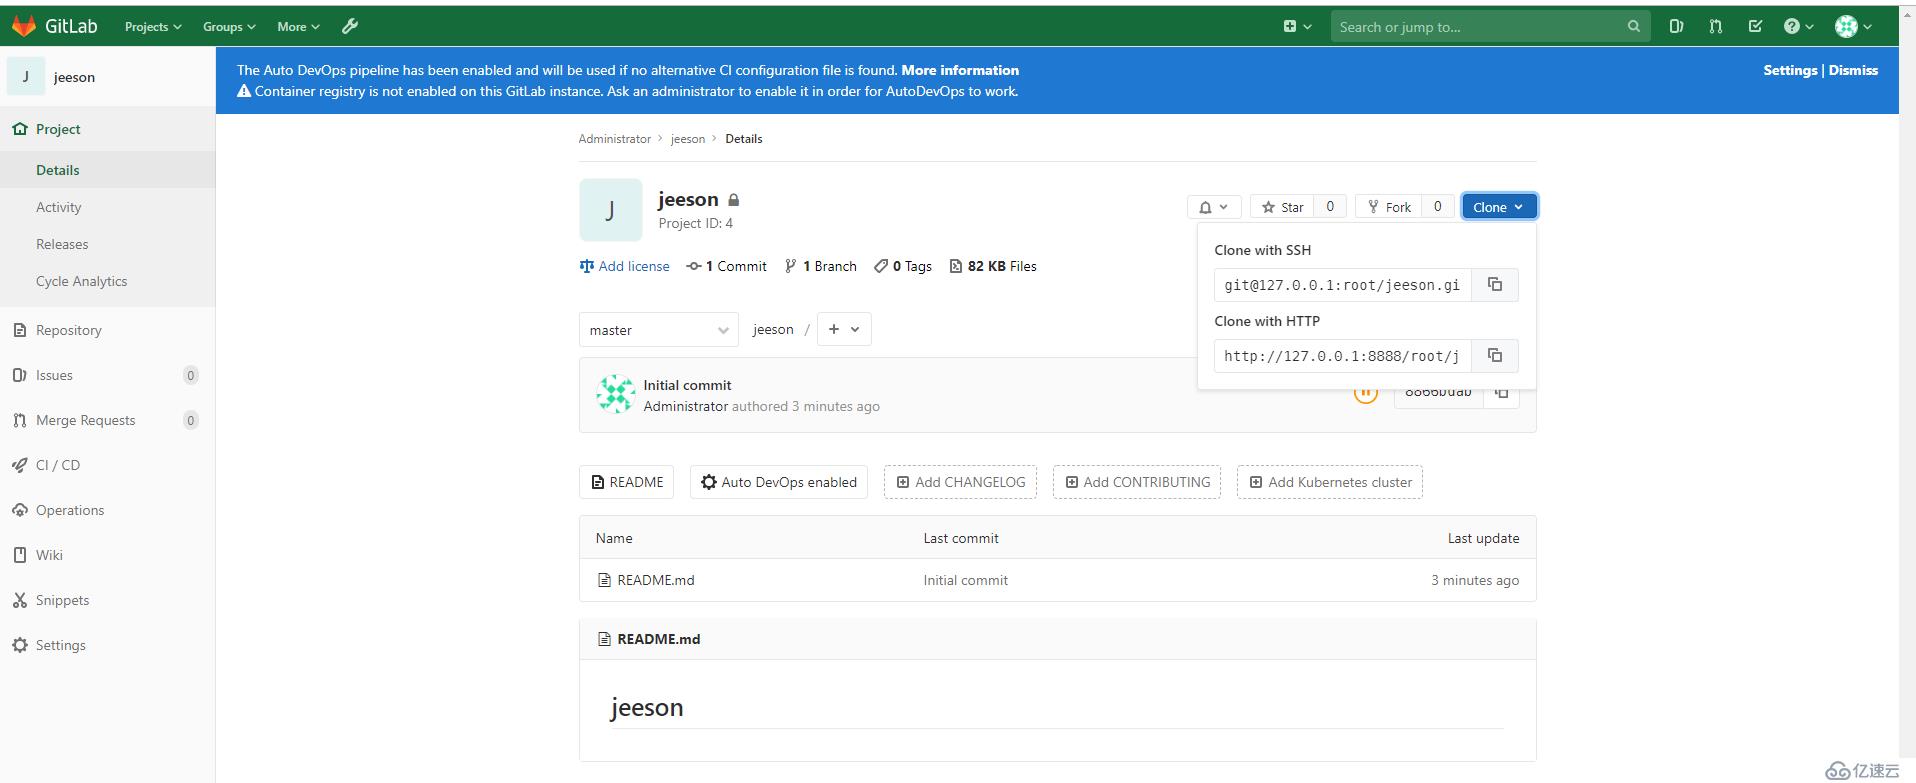
(五)、客戶端下載和上傳文件,都在客戶端操作
1、進入到相應的目錄,下載代碼
[root@DEV004019 data]# mkdir /opt/gitlab
[root@DEV004019 data]# cd /opt/gitlab/
[root@DEV004019 gitlab]# git clone http://192.168.4.97/root/jeeson.git
Cloning into 'jeeson'...
Username for 'http://192.168.4.97': root
Password for 'http://root@192.168.4.97':
remote: Enumerating objects: 6, done.
remote: Counting objects: 100% (6/6), done.
remote: Compressing objects: 100% (3/3), done.
remote: Total 6 (delta 0), reused 0 (delta 0)
Unpacking objects: 100% (6/6), done.
[root@DEV004019 gitlab]# ll
total 0
drwxr-xr-x 4 root root 64 Nov 20 16:48 jeeson
2、編輯相應的腳本文件
[root@DEV004019 jeeson]# vim testlqb.sh

echo "this is test shell "3、將新增的文件加入到索引中[root@DEV004019 jeeson]# git add testlqb.sh
4、將該文件提交到本地倉庫中
[root@DEV004019 jeeson]# git commit -m "this is test shell"
[master 380ea1d] this is test shell
 1 file changed, 1 insertion(+)
 create mode 100644 testlqb.sh
5、將文件同步到gitlab服務器上
[root@DEV004019 jeeson]# git push -u origin master
Username for 'http://192.168.4.97': root
Password for 'http://root@192.168.4.97':
Counting objects: 4, done.
Delta compression using up to 4 threads.
Compressing objects: 100% (2/2), done.
Writing objects: 100% (3/3), 286 bytes | 0 bytes/s, done.
Total 3 (delta 1), reused 0 (delta 0)
To http://192.168.4.97/root/jeeson.git
   c47a84c..380ea1d  master -> master
Branch master set up to track remote branch master from origin.
6、在gitlab服務器的網頁查看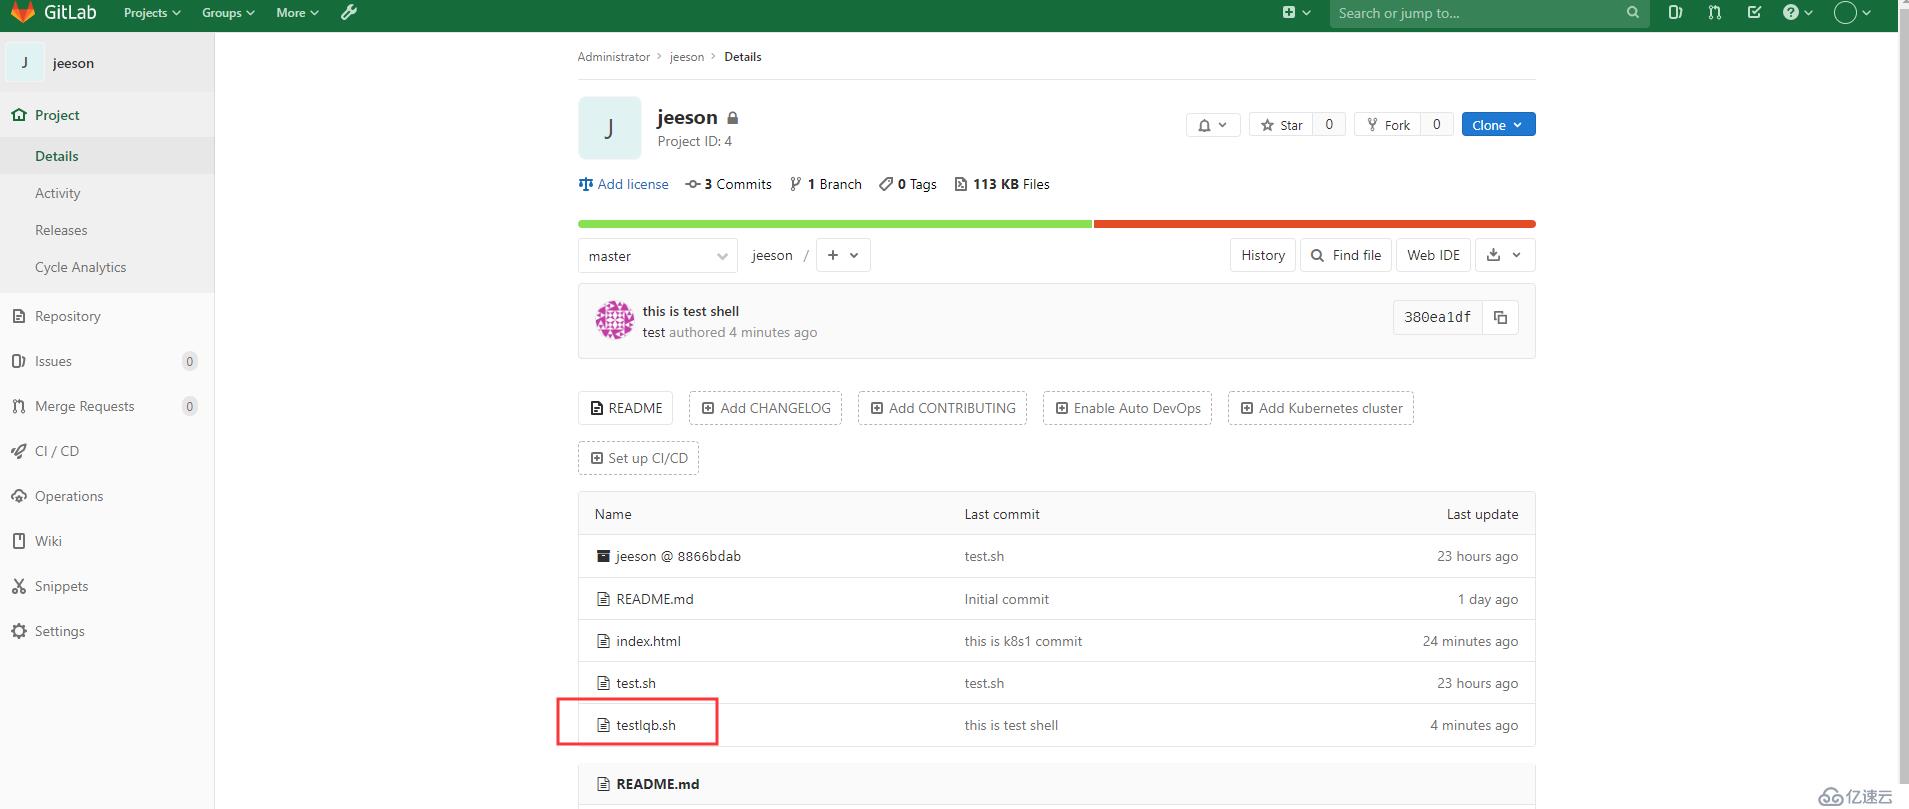
免責聲明:本站發布的內容(圖片、視頻和文字)以原創、轉載和分享為主,文章觀點不代表本網站立場,如果涉及侵權請聯系站長郵箱:is@yisu.com進行舉報,并提供相關證據,一經查實,將立刻刪除涉嫌侵權內容。