您好,登錄后才能下訂單哦!
您好,登錄后才能下訂單哦!
一、配置郵件告警、微信告警和釘釘告警:
1、配置郵件告警:
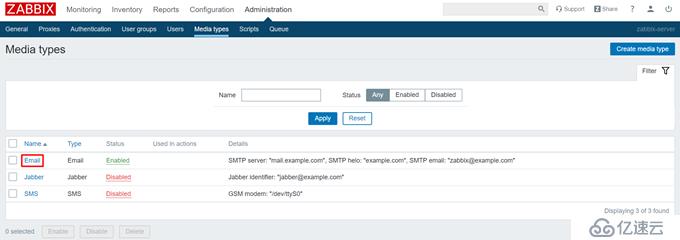
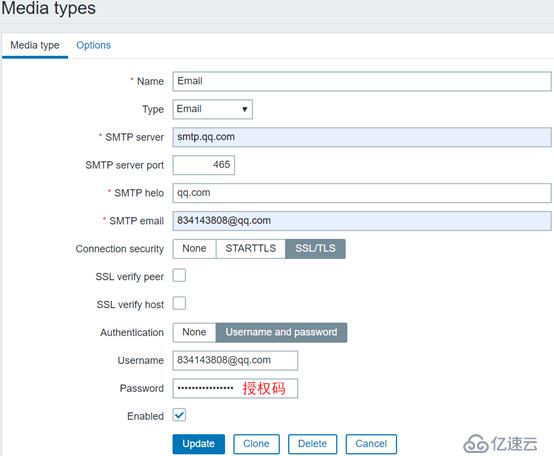
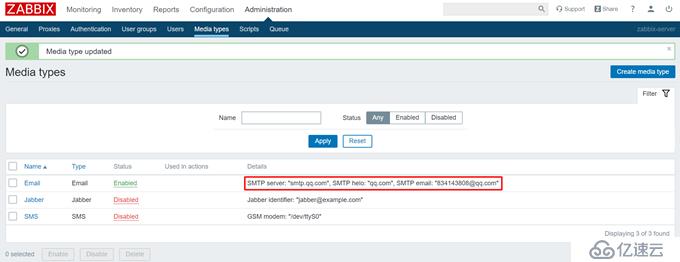
(1)定義發件人:
Administration --> Media types --> Email --> Media type --> Update
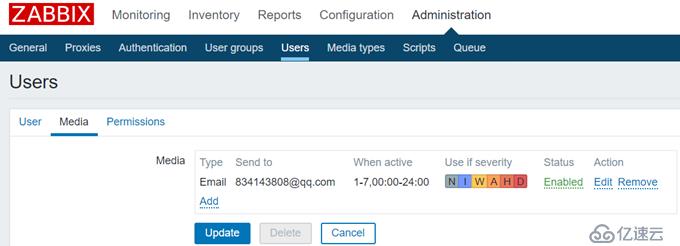
(2)定義收件人:
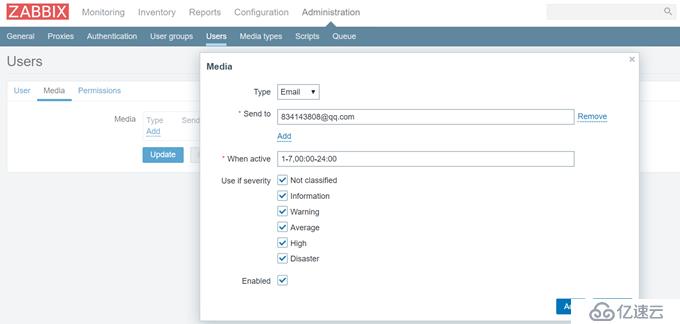
Administration --> Users --> Admin --> Media --> Add --> Update

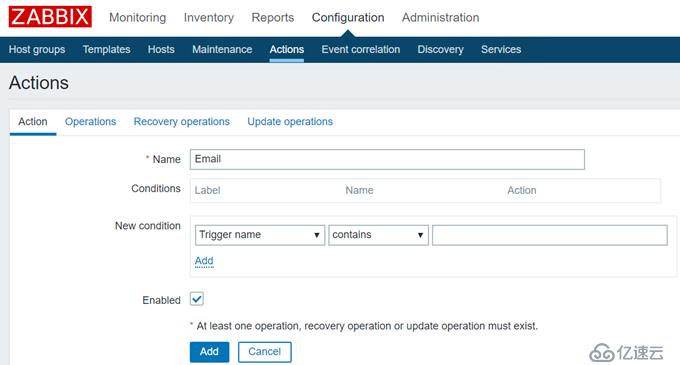
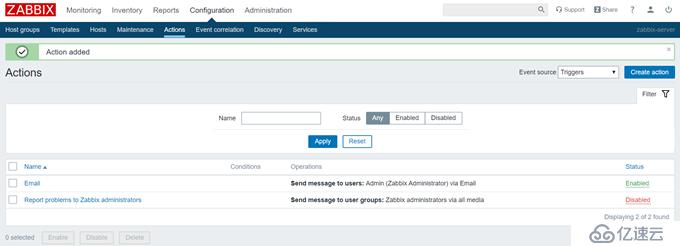
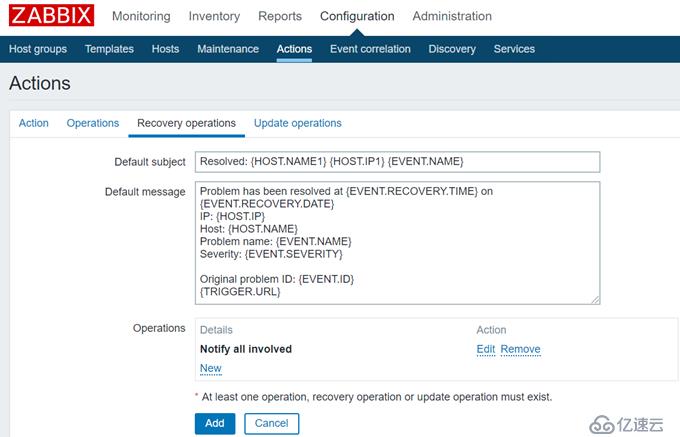
(3)定義動作:
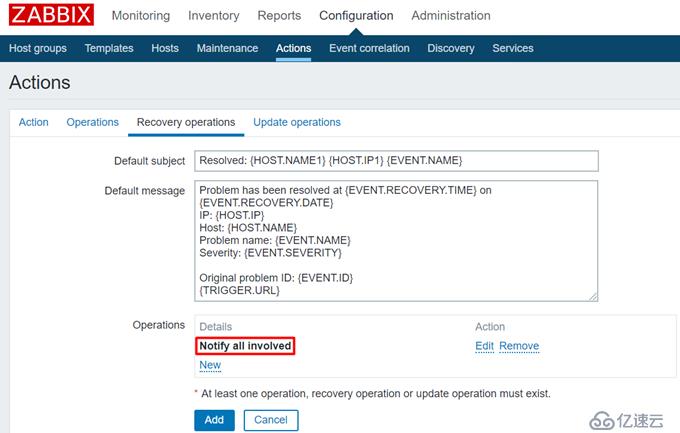
Configuration --> Actions --> Create action --> Add

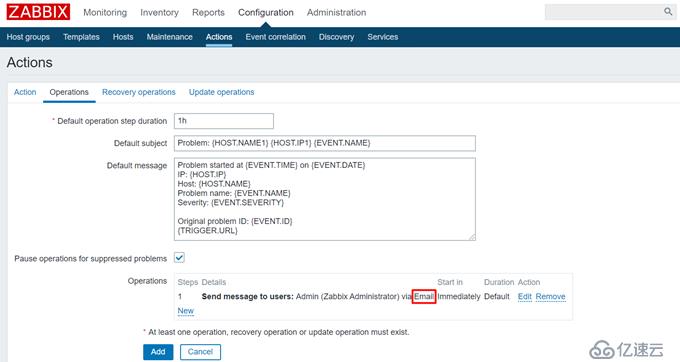
備注:自定義告警內容
https://www.zabbix.com/documentation/4.0/zh/manual/appendix/macros/supported_by_location
2、配置微信告警:
(1)注冊企業微信:https://work.weixin.qq.com/
(2)微信掃碼登錄:
我的企業 --> 微工作臺 --> 邀請關注(使用微信掃描二維碼直接關注)
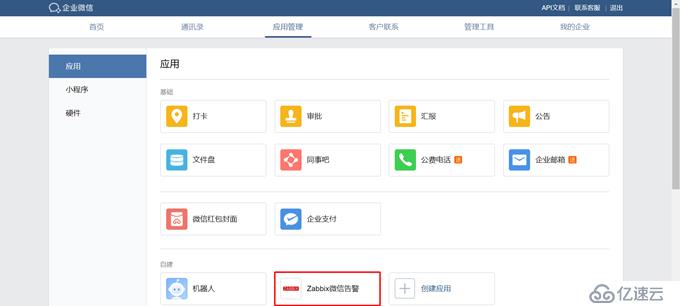
應用管理 --> 應用 --> 自建 --> 創建Zabbix微信告警應用
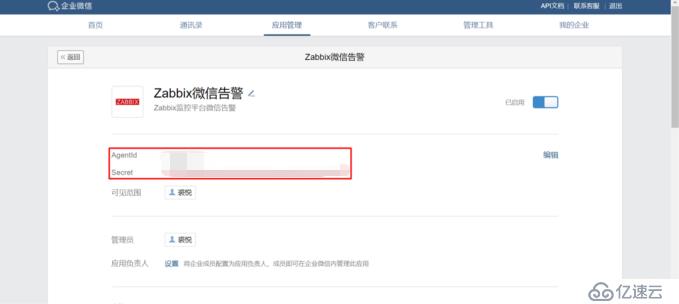
我的企業 --> 企業信息 --> 企業ID

通訊錄:


(3)編寫微信告警腳本:
# grep ^AlertScriptsPath /etc/zabbix/zabbix_server.conf

# cd /usr/lib/zabbix/alertscripts
# vim wechat.py
#!/usr/bin/env python
#-*- coding: utf-8 -*-
#comment: Zabbix微信告警腳本
?
import requests
import sys
import os
import json
import logging
?
logging.basicConfig(level=logging.DEBUG, format='%(asctime)s, %(filename)s, %(levelname)s, %(message)s',datefmt='%a, %d %b %Y %H:%M:%S',filename=os.path.join('/tmp','wechat.log'),filemode='a')
?
corpid='XXXXXXXX'
appsecret='XXXXXXXX'
agentid='XXXXXXXX'
?
#獲取accesstoken
token_url='https://qyapi.weixin.qq.com/cgi-bin/gettoken?corpid=' + corpid + '&corpsecret=' + appsecret
req=requests.get(token_url)
accesstoken=req.json()['access_token']
?
#發送消息
msgsend_url='https://qyapi.weixin.qq.com/cgi-bin/message/send?access_token=' + accesstoken
?
touser=sys.argv[1]
subject=sys.argv[2]
message=sys.argv[2] + "\n\n" +sys.argv[3]
?
params={
"touser": touser,
"msgtype": "text",
"agentid": agentid,
"text": {
"content": message
},
"safe":0
}
req=requests.post(msgsend_url, data=json.dumps(params))
logging.info('sendto:' + touser + ';;subject:' + subject + ';;message:' + message)
# chmod +x wechat.py
備注:上述腳本中的XXXXXXXX需要按照實際情況替換
(4)執行wechat.py腳本前的準備工作:
a、配置epel源:# yum -y install epel-release
b、安裝python2-pip軟件包:
# python --version

# yum -y install python2-pip
c、修改pip源為阿里云鏡像源:
# mkdir -pv ~/.pip
# vim ~/.pip/pip.conf
[global]
index-url = http://mirrors.aliyun.com/pypi/simple/
[install]
trusted-host = mirrors.aliyun.com
d、升級pip軟件包:
# pip -V

# pip install --upgrade pip
# pip -V

e、安裝Python的requests模塊:# pip install requests
f、創建日志文件,并修改其屬主屬組:
# touch /tmp/wechat.log
# chown zabbix.zabbix /tmp/wechat.log
(5)測試wechat.py腳本:
# /usr/lib/zabbix/alertscripts/wechat.py 'XXXX' '主題:test' '內容:wechat alert'

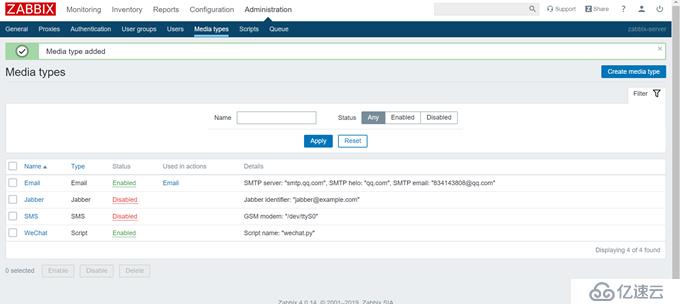
(6)媒介中新增微信告警:
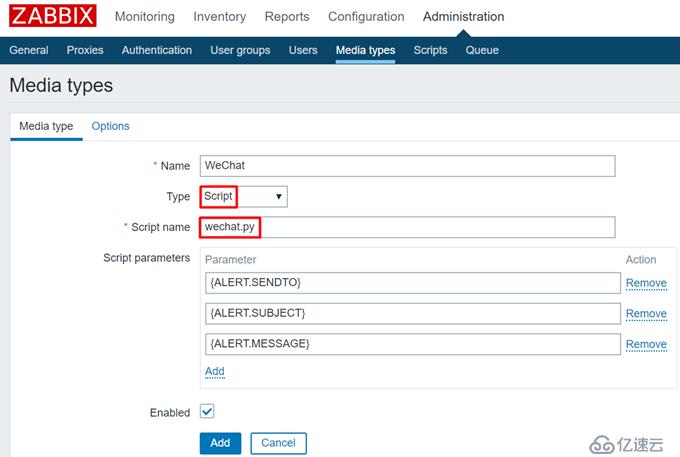
Administration --> Media types --> Create media type --> Media type --> Add

需要3個參數:{ALERT.SENDTO}、{ALERT.SUBJECT}、{ALERT.MESSAGE}
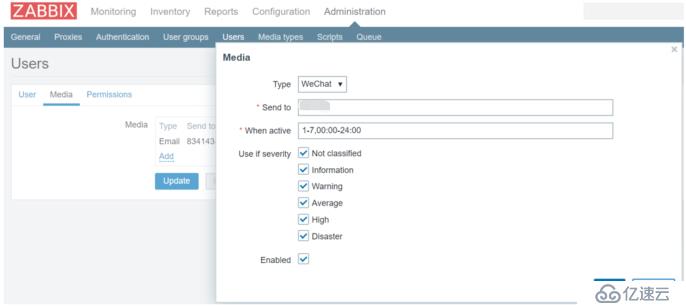
(7)對應用戶中設置報警媒介:
Administration --> Users --> Admin --> Media --> Add --> Update

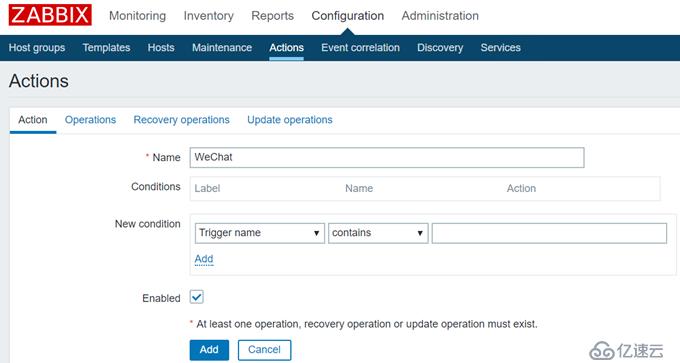
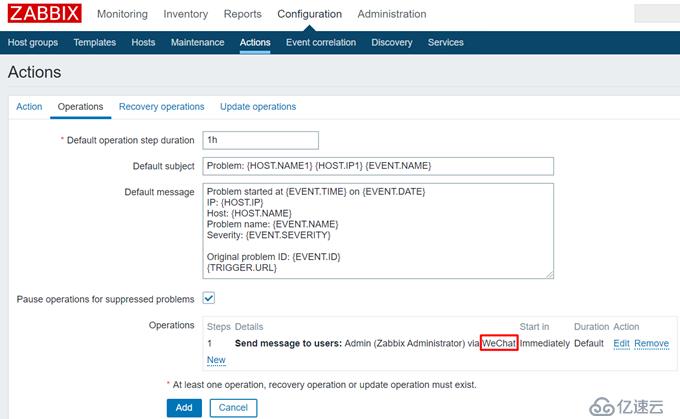
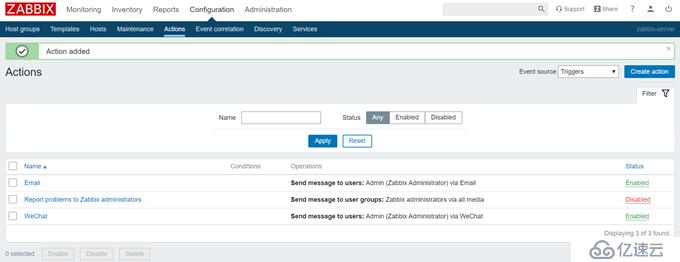
(8)定義動作:
Configuration --> Actions --> Email --> Clone --> Add
3、配置釘釘告警:
(1)需要服務器公網出口IP
(2)注冊企業釘釘:https://oa.dingtalk.com/
(3)釘釘掃碼,輸入管理密碼后登錄:
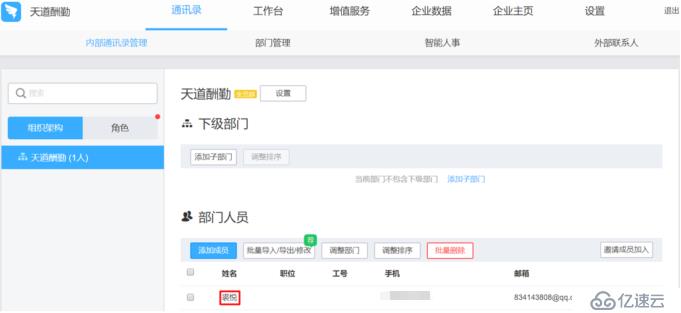
通訊錄 --> 內部通訊錄管理 --> 部門人員 --> 邀請成員加入(使用釘釘掃描二維碼申請加入)
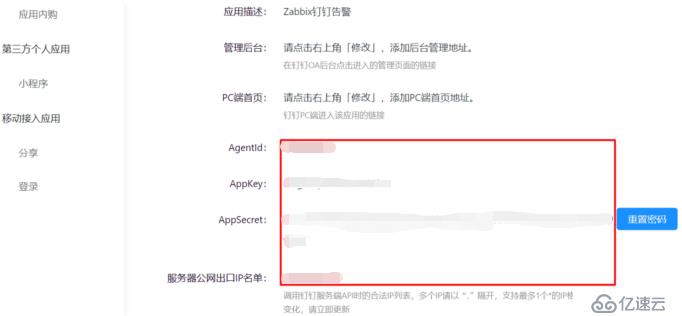
工作臺 --> 應用管理 --> 自建應用 --> 創建Zabbix釘釘告警應用

釘釘開放平臺:https://open-dev.dingtalk.com/


(4)編寫釘釘告警腳本:
# cd /usr/lib/zabbix/alertscripts
# vim dingtalk.py
#!/usr/bin/python
# -*- coding: utf-8 -*-
import json,urllib2,sys
?
appkey = 'XXXXXXXX'
appsecret = 'XXXXXXXX'
agentid = 'XXXXXXXX'
touser = sys.argv[1]
content = sys.argv[2]
?
tockenurl = 'https://oapi.dingtalk.com/gettoken?corpid=' + appkey + "&corpsecret=" + appsecret
tockenresponse = urllib2.urlopen(tockenurl)
tockenresult = json.loads(tockenresponse.read().decode('utf-8'))
tocken = tockenresult['access_token']
?
sendurl = 'https://oapi.dingtalk.com/message/send?access_token=' + tocken
headers = {
'Content-Type':'application/json'
}
main_content = {
"touser": touser,
"toparty": "",
"agentid": agentid,
"msgtype": "text",
"text": {
"content": content
}
}
main_content = json.dumps(main_content)
req = urllib2.Request(sendurl,headers=headers)
response = urllib2.urlopen(req, main_content.encode('utf8'))
print(response.read().decode('utf-8'))
# chmod +x dingtalk.py
備注:上述腳本中的XXXXXXXX需要按照實際情況替換
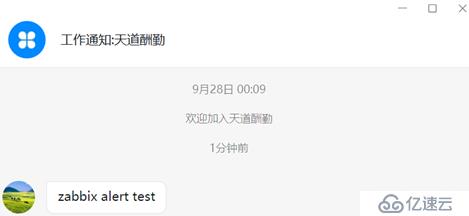
(5)測試dingtalk.py腳本:

# /usr/lib/zabbix/alertscripts/dingtalk.py 'XXXX' 'zabbix alert test'
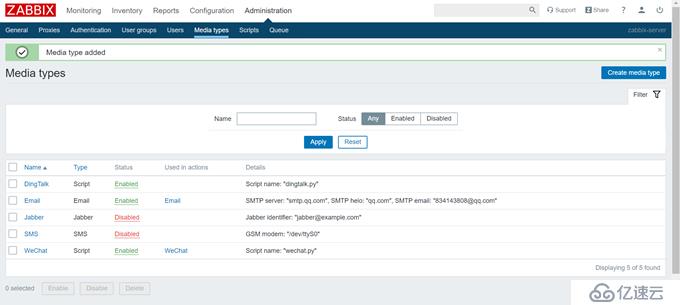
(6)媒介中新增釘釘告警:
Administration --> Media types --> Create media type --> Media type --> Add
需要2個參數:{ALERT.SENDTO}、{ALERT.MESSAGE}

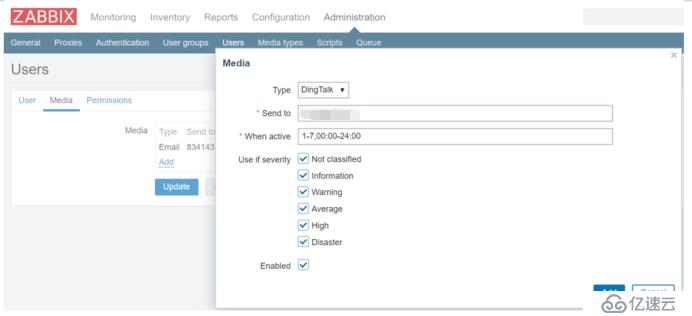
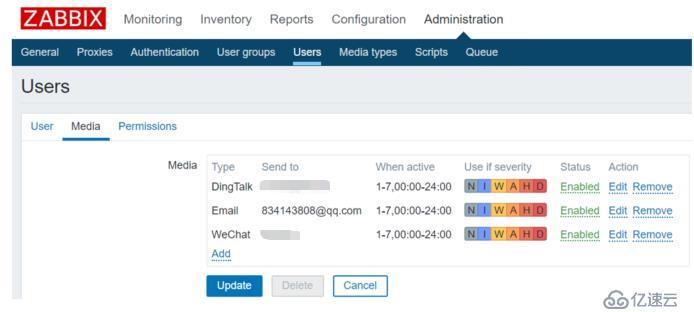
(7)對應用戶中設置報警媒介:
Administration --> Users --> Admin --> Media --> Add --> Update
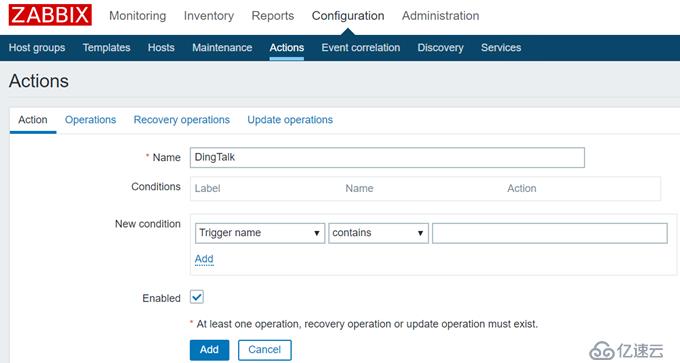
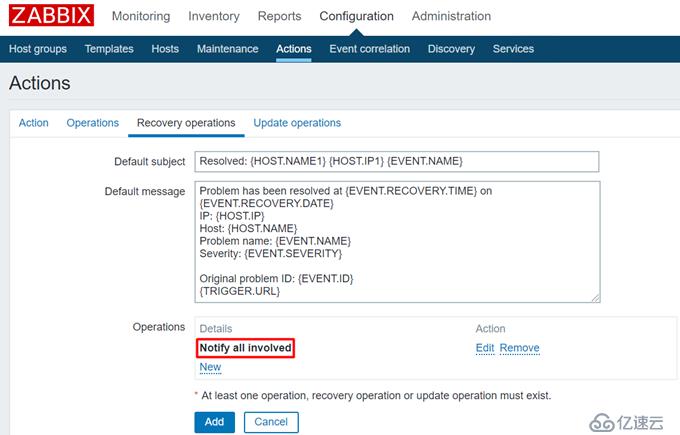
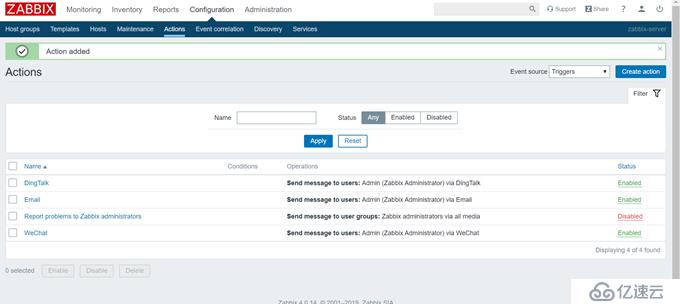
(8)定義動作:
Configuration --> Actions --> Email --> Clone --> Add

4、告警測試:
(1)停止node-122節點上的vsftpd:# systemctl stop vsftpd
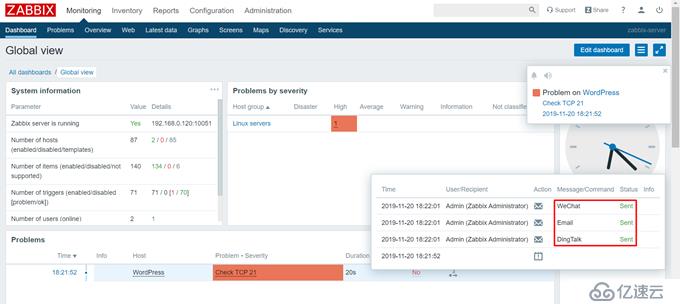
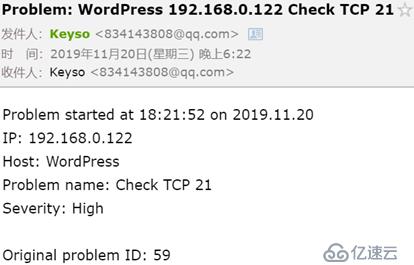
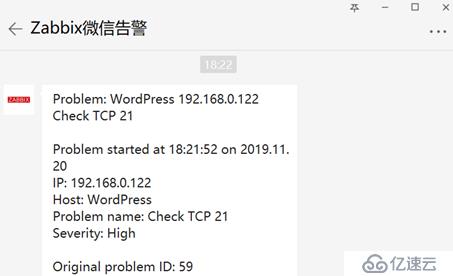
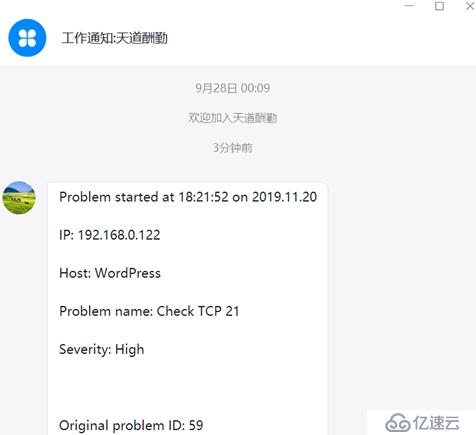
查看Action log:Reports --> Action log
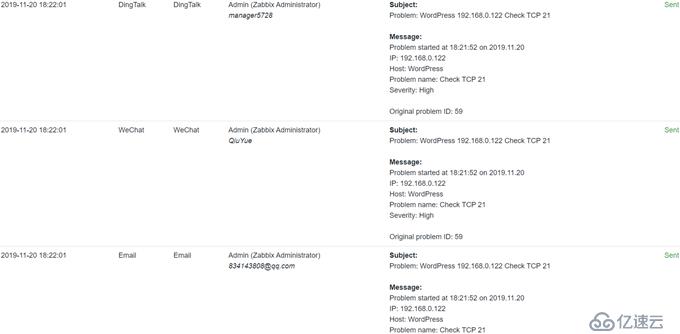
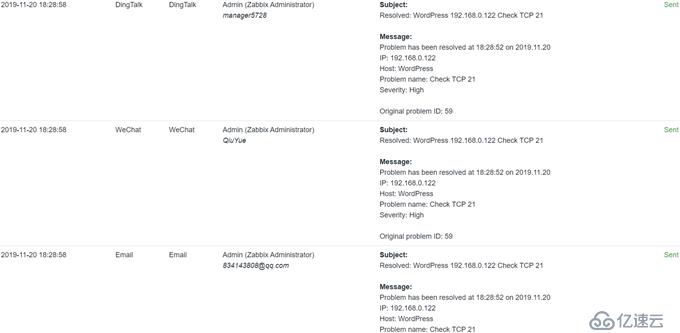
(2)啟動node-122節點上的vsftpd:# systemctl start vsftpd
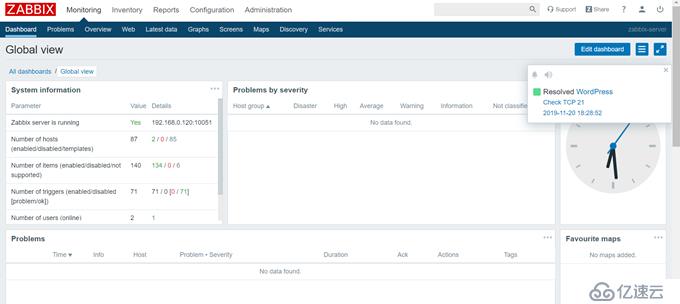
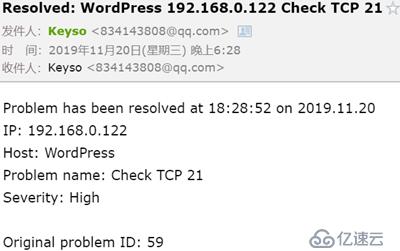
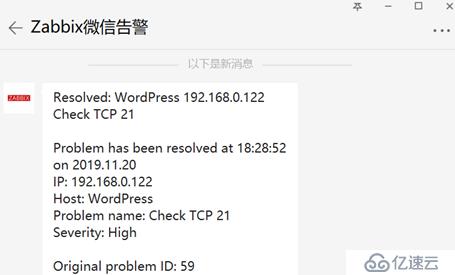
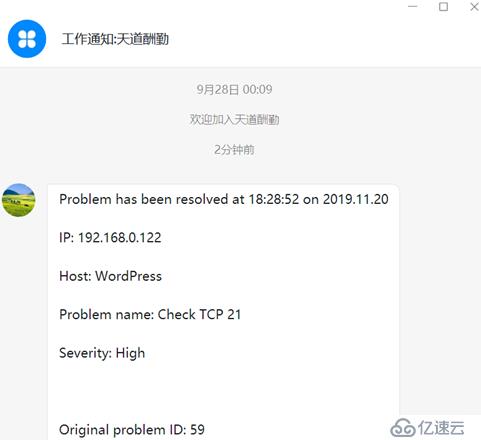
查看Action log:Reports --> Action log
免責聲明:本站發布的內容(圖片、視頻和文字)以原創、轉載和分享為主,文章觀點不代表本網站立場,如果涉及侵權請聯系站長郵箱:is@yisu.com進行舉報,并提供相關證據,一經查實,將立刻刪除涉嫌侵權內容。