您好,登錄后才能下訂單哦!
您好,登錄后才能下訂單哦!
小編這次要給大家分享的是詳解Python中unittest單元測試openpyxl實現過程,文章內容豐富,感興趣的小伙伴可以來了解一下,希望大家閱讀完這篇文章之后能夠有所收獲。
一。初識單元測試
1)定義:
單元:函數或者是類
單元測試:測試類或者函數
python內置的單元測試框架:unittest
2)單元測試的意義
好處:投入小,收益大。能夠精準的,更早的發現問題。
3)單元測試與測試關系
python 很難測試 java 的單元。
關鍵是單元測試一般是開發或者測試開發做的。
測試一般會在集成、系統、驗收進行測試
4)unittest的注意事項:
1.模塊名需要以 test_ 開頭
2.類名:以 Test 開頭
3.測試用例的方法名稱以 test_ 開頭
4.單元測試寫入方式(其中TestLogin是測試模塊):TestLogin(unittest.TestCase)
5)如何寫測試用例
#首先需要引入單元測試框架
import unittest
#login模塊校驗規則
def login(username=None, password=None):
  """登錄"""
  if (not username) or (not password):
    # 用戶名或者密碼為空
    return {"msg": "empty"}
  if username == 'yuz' and password == '123456':
    # 正確的用戶名和密碼
    return {"msg": "success"}
  return {"msg": "error"}

#單元測試用例
class TestLogin(unittest.TestCase):
  def setUp(self):
    pass
  def tearDown(self):
    pass
  #登錄賬號與密碼為空
  def test_login_01_null(self):
    username=''
    password=''
    expected_result={"msg": "empty"}
    actual_result=login(username,password)
    self.assertTrue(expected_result == actual_result)

  #登錄賬號為空
  def test_login_02_usernull(self):
    username=''
    password='123456'
    expected_result={"msg": "empty"}
    actual_result=login(username,password)
    self.assertTrue(expected_result == actual_result)

  #登錄密碼為空
  def test_login_03_passwordnull(self):
    username='yuz'
    password=''
    expected_result={"msg": "empty"}
    actual_result=login(username,password)
    self.assertTrue(expected_result == actual_result)
  #正常登錄
  def test_login_04_correct(self):
    username = 'yuz'
    password = '123456'
    expected_result = {"msg": "success"}
    actual_result = login(username, password)
    self.assertEqual(expected_result,actual_result)

  #賬號輸入錯誤
  def test_login_05_usererro(self):
    username = 'linzai'
    password = '123456'
    expected_result = {"msg": "error"}
    actual_result = login(username, password)
    self.assertTrue(expected_result == actual_result)

  #密碼輸入錯誤
  def test_login_06_usererro(self):
    username = 'yuz'
    password = '12345698'
    expected_result = {"msg": "error"}
    actual_result = login(username, password)
    self.assertTrue(expected_result == actual_result)

  #賬號與密碼都錯誤
  def test_login_07_userpassworderror(self):
    username='linzai'
    password='laksls'
    expected_result={"msg": "error"}
    actual_result=login(username,password)
    self.assertTrue(expected_result == actual_result)

#執行方法
if __name__ == '__main__':
  unittest.main()
6)測試用例執行順序
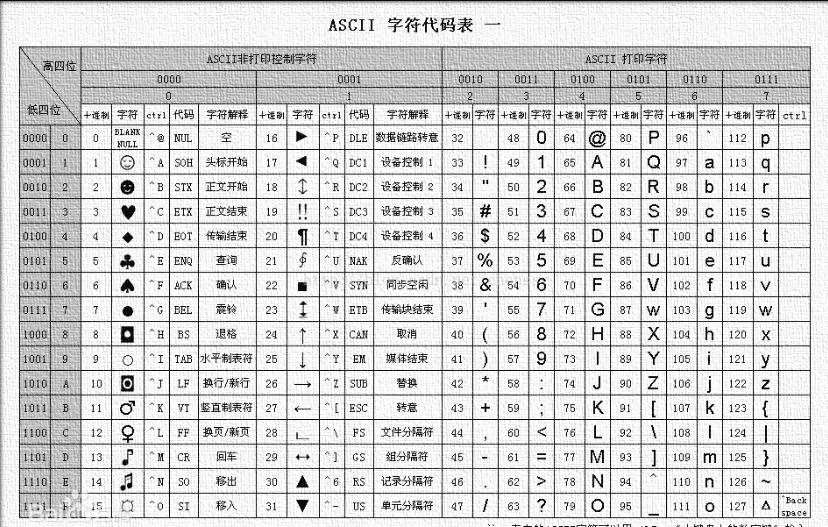
采取ASCII標準按順序進行執行

二。單元深入了解。(用例執行、組織、收集、運行流程)
1。用例執行
2.用例組織
會把測試用例的代碼放到一個統一的文件夾當中或者目錄當中。
如下:

3.測試用例收集
需要把每個測試用例模塊當中的測試用例收集到一起,一起執行。
1)方法一:(創建一個測試用例加載器,使用discover 收集所有用例)
#初始化一個測試用例加載器
loder=unittest.TestLoader()
#先拿到該.py文件的絕對路徑
file_path=os.path.abspath(__file__)
#拿到測試模塊的路徑
case_path=os.path.join(os.path.dirname(file_path),'test')
#使用loder收集所有的測試用例
test_suit=loder.discover(case_path)
print(test_suit)
運行結果(discover收集的內容是一個列表,如下圖):


[<unittest.suite.TestSuite tests=[<unittest.suite.TestSuite tests=[<test_login.TestLogin testMethod=test_login_01_null>, <test_login.TestLogin testMethod=test_login_02_usernull>, <test_login.TestLogin testMethod=test_login_03_passwordnull>, <test_login.TestLogin testMethod=test_login_04_correct>, <test_login.TestLogin testMethod=test_login_05_usererro>, <test_login.TestLogin testMethod=test_login_06_usererro>, <test_login.TestLogin testMethod=test_login_07_userpassworderror>]>]>, <unittest.suite.TestSuite tests=[]>, <unittest.suite.TestSuite tests=[]>]>
2)方法二(創建一個測試用例加載器loder,加載測試用例創建測試集并對用例進行添加):
from class_16_unittest單元測試集及報告.test import test_login,test_register
loder=unittest.TestLoader()
case_path=os.path.join(os.path.dirname(os.path.abspath(__file__)),'test')
#加載測試用例
suite_login=loder.loadTestsFromModule(test_login)
suite_register=loder.loadTestsFromModule(test_register)
#初始化一個測試集合 suite
suite_total=unittest.TestSuite()
#添加測試用例
suite_total.addTest(suite_login)
suite_total.addTest(test_register)
4.運行流程
1)執行方法一,沒有測試報告(使用的是測試用例收集方法二進行的執行):
runner = unittest.TextTestRunner()
runner.run(suite_total)
運行結果:

2)執行方法二,有測試報告:
1.自帶的測試報告(TextTestRunner)
with open("test_result.txt",'w',encoding='utf-8') as f:
  runner = unittest.TextTestRunner(f)
  runner.run(suite_total)
運行結果:


2.HTMLTestRunner(測試報告模板)
with open("test_result.html",'wb') as f:
  runner = HTMLTestRunner(f,
              title='測試title',
              description="測試報告的描述",
              tester='測試人'
              )
  runner.run(suite_total)
運行結果:[/code]


三。openpyxl
1.安裝與使用范圍
安裝:pip install openpyxl
范圍(2003年后):xlsx
xls格式:需要用xlrd, xlwt
2.使用
導入
import openpyxl
from openpyxl.worksheet.worksheet import Worksheet
#打開文件
workbook=openpyxl.load_workbook('cases.xlsx')
# print(workbook)

#獲取表單名

1)#sheet : Worksheet 可以獲取到 對應得表單名字
sheet : Worksheet=workbook['Sheet1']
# print(sheet)
2)#方法二,通過表單名或者排列順序獲得操作表單
sheet=workbook['Sheet1']
#根據位置獲取操作表單名稱
sheet=workbook.worksheets[0]

#獲取數據
1)#根據表單行列獲取表單對象,row:行 column:列

cell=sheet.cell(row=2,column=3)

print(cell)
#獲取表單數據
print(cell.value)
運行結果:
excel表信息:

2)#根據最大行列,進行獲取數據,使用嵌套循環的方法把表單數據一行一行的化為列表返回
注意:

#獲取表單的最大行數
row_max=sheet.max_row
#獲取最大列數
cloumn_max=sheet.max_column

#使用嵌套循環的方式,精準的拿到每一個坐標的對象,然后轉化為值
row_data=[]
for row in range(1,row_max+1):
  cloumn_data=[]
  for cloumn in range(1,cloumn_max+1):
    #print(sheet.cell(row,cloumn))
    cloumn_data.append(sheet.cell(row,cloumn).value)
  row_data.append(cloumn_data)
print(row_data)
#運行結果:
3)#根據最大行列,進行獲取數據,使用嵌套循環的方法把表單數據一行一行的化為dict返回
#獲取第一行表單對象
sheet[1]
#可以與切片一起獲取固定行的對象
sheet[1:]


row_data=[]
#獲取第一行的所有值
header=[c.value for c in sheet[1]]
for row in range(2,row_max+1):
  cloumn_data=[]
  for cloumn in range(1,cloumn_max+1):
    #print(sheet.cell(row,cloumn))
    cloumn_data.append(sheet.cell(row,cloumn).value)
    #print(cloumn_data)
  #使用zip函數把header與一行一行數據進行 分組并返回 tuple對象,然后使用dict轉化為字典
  dict_data=dict(zip(header,cloumn_data))
  row_data.append(dict_data)
print(row_data)
運行結果:

看完這篇關于詳解Python中unittest單元測試openpyxl實現過程的文章,如果覺得文章內容寫得不錯的話,可以把它分享出去給更多人看到。
免責聲明:本站發布的內容(圖片、視頻和文字)以原創、轉載和分享為主,文章觀點不代表本網站立場,如果涉及侵權請聯系站長郵箱:is@yisu.com進行舉報,并提供相關證據,一經查實,將立刻刪除涉嫌侵權內容。